DNA 75 Color, 100 Color, 250 Color
1,150 files
-
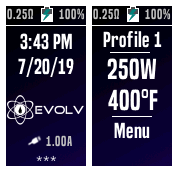
bilingual theme Enhanced 2 in 1 "EVOLV" - NOW WITH "SESSION MODE"
By CMK
Tailormade themes for private use are available on request for almost every brand in almost every color
- deutsch und englisch umschaltbar in einer Bedienoberfläche
- too many details to list them; You will discover them in daily use and you will love them ...
+
Description_for _translation.txt
If someone is interested in a version with a brand logo / background according to their own wishes - just leave a comment and I'll see if it can be implemented.
See also my other Themes:
6,856 downloads
- english + deutsch
- replay
- (and 4 more)
-
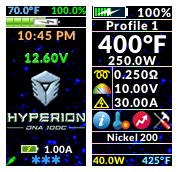
replay ✪ Hyperion - Odin Mini - Paranormal and others - Replay Ready - English & Italian ✪
By Frank65
Last Version Rev 2.8.9 - August 2021
Full options theme with Replay. Rev 2.8.8 - March 2019
28,328 downloads
-
multiple ui Gauges - Major update 2.0.0
Supports DNA250c and DNA75c, and Replay on both of those chips. Now you can choose from two different UI from the settings page.
You need the latest international firmware 1.1 SP33.2 INT (included with EScribe Suite 2.0 SP15) on your DNA75c for it to work.
Note:
The status messages, like temp protected or atomizer short etc. are only displayed when firing.
Press the fire button to exit the menu or any other page that doesn't have a back button.
I hope you guys like it!
Also check out my other themes:
28,052 downloads
- replay
- minimalstic
- (and 10 more)
-
DJLsb Theme with Replay
By Stepladder
This is a modified version of the DJLsb theme that came pre-installed on my Lost Vape Paranormal/Therion 75c mods - full credit goes out to Daniel@djlsbvapes for the design of this excellent user interface that offers an array of functionality without being too cluttered and over complicated.
I was unable to find a Replay enabled version, so took up the challenge of integrating Evolv's main screen UI so I could continue using my favorite theme with the added benefit of Replay. Edit: Daniel@djlsbvapes as since released an updated version with Replay, a copy of which can be found on his website.
Older 75c devices - so long as you have taken all the right steps to upgrade your firmware this theme will work just fine - I found YouTube video: 'Replay Mode - how to get it on your 75C' by 'vaping v1ck' helpful, please also check here for guidance.
250c devices - no firmware upgrade required, just upload and go. Happy days 😉
UIColourToggle function available in V2.1 onwards. This feature appears on both the MAIN and REPLAY screens allowing you to toggle your UI between white and a mono color of your choosing for matchy matchy customisation i.e. orange matches up really well with silver Paranormal/wooden panels, as does Stealth with my carbon/black edition Therion for a classy toned-down look - other colour options to suit Mirage are also available from the download section.
UI toggle buttons are conveniently located to provide quick switching between mono color and the default bright white display - useful in bright sunny conditions 🙂
Other modifications include:
- PowerBank UI included to support USB-On-the-go (new)
- ‘Warmth of Puff’ feature included on REPLAY screen
- Up to 4x battery voltages included
- Minor tweaks to button/field positions and removal of separation lines to provide clearer/ergonomic viewing.
- Lost Vape emblem in place of full logo - for sharper imaging.
- Revised battery indicators for improved vividness.
Fully optimised for dna250c, and cross-compatible with dna75c devices
ColourToggle options: Green, Orange, Stealth, Blue, Red, Cyan, Purple and now Magenta...choose to best suit your setup.
8,612 downloads
-
_dna250c_ecigtheme.a7548928fb665d0fbe6282876e0082b8.png)
русский Тема на русском
By zark
Бонус! Добавлена стандартная тема на русском .
Основная тема, бюджет на базе тем Frank65, начиналась с переделки темы Френка под себя, в результате были переделаны и исправлены практически все функции и режимы, кардинально изменена навигация по меню. , Все функции работают более корректно, полностью автоматизированы в работе и переключении режима, по просьбам коллег не переведены некоторые названия, которые являются принятыми сленгом во всем мире, все интуитивно понятно, подсказки по каждой функции на русском.
Английская версия здесь
Э то моя самая сложная, рассчитанная на опытных пользователей, тема. Более подходит для DNA 250c на трех аккумуляторах. После перегрева кнопки кнопки добавили температуру при вводе главном отдельном окне (так же добавленное отображение времени (при нажатии фаер) / заряда батарейки в поле сообщениями платы (Включается кнопка (верхний правый угол экрана Главного экрана))
На экране USB и Powerbank добавлено изменение цвета цифр при большом нагреве, и описание работы (заряд / разряд / работа)
Тема построена так, чтобы не вчитываться в цифры и значки, а по цветовому оформлен видеть опасное состояние мода
Доступ к развернутым настройкам температуры, мощности, преднагрева (тип преднагрева и режим Warmith) прямо с главного экрана. Подсказки на РУССКОМ для простоты использования настроек
Быстрый доступ к глубоким настройкам сопротивления прямо с главного экрана. Возможность корректировки «комнатной» температуры для более гибкой настройки холодного сопротивления.
В меню сопротивления (переход с главного экрана, выбор поля сопротивления) возможно включение / выключение режима REPLAY для термоконтрольных материалов , не зависимо был разрешен REPLAY для данного профиля в Escribe. Добавлено условие- для воспроизведения необходимо отключить переключатель термозащиты (без этого условия режим воспроизведения работал не всегда корректно) и включить переключатель Replay, который станет активным после отключения температурной защиты.
При отключении термозащиты мод автоматически переходит в режим Ватт.
Доступ ко всем настройкам мода из одного меню
На вкладке Графики отображения времени и даты затяжек
Увеличенный функционал режима Replay и термоконтроль
Смена оформления при выборе опасных настроек
Увеличенная разрядность для более точного контроля параметров работы мода
Переключение шага регулировки 0,1, 0,5, 1, 5 Ватт и 1 ° C или 5 ° C
Простая навигация, без многоярусных переходов, возврат на главный экран из любого вкладки, возврат на предыдущий экран- удержание кнопки "вверх", возврат на главный экран, удержание кнопки "вниз", либо выбор поля Status /
При зарядке, на главном экране вместо индикатора батареи отображается ток заряда (при выделении иконки батареи)
Режим Power bank стабилизирован и работает отлично
Настолько развернутые термоконтроля я объяснял в своих публикациях
2,459 downloads
-
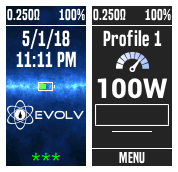
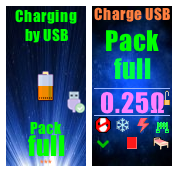
replay Clean Colors (75C/100C/250C w/Replay - Many colors available)
By niandra3
Note: The lightning bolt on the battery is only visible while charging.
Replay ready! (with temp control and wattage modes available too) - See below if you are having trouble with Replay Main menu is on the top right You can hide data on main screen in Main Screen menu (resistance, voltage, etc) You can hide date/time from Lock screen in Time Config page (also can choose MM/DD or DD/MM date format) There is now a ONE WATT version for those who want one-watt increments on the main screen (regular version is 5-watt increments). Now available in BLUE, BLACK, GREEN, and RED see downloads page: Clean-Color--ONE-WATT-#_#.ecigtheme A LOT of other stuff.. check it out!' If you have requests for new colors, or other customization, let me know in the comments section and I can usually whip something up pretty quickly.
--------------------------------------------------------------
Replay info: This theme works with Replay for 75c devices (250c devices work with Replay by default). BUT you need to have the International Edition of EScribe 2.0 SP15.1 or later. Your 75c needs to have the right firmware as well (at least 1.1 SP33.2 - that one works for me), once you update ESscribe and connect your device it should prompt you to update firmware. You also MUST enable Replay in your EScribe profile for it to work.
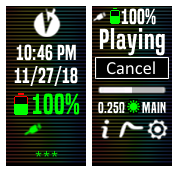
Using replay: once the above has been completed, load this theme and switch to a replay-enabled profile. There should be a "NO REPLAY" button seen on the main screen. This means there aren't yet any puffs to save. So take a few puffs, until you find one you like. Then the button should change to "SAVE," and you can click that to save that latest puff. Once Saved, the button changes to "PLAYING" and you are in Replay mode. Click that if you want to end Replay.
If you are having trouble, check the Replay menu because it gives you more info:
Replay Available (if theme/coil supports Replay [read-only]) Replay Ready (Replay is ready to be activated [read-only]) Replay Active (you can toggle this switch to save your last puff and activate Replay). You also cannot use a plain kanthal coil for Replay. You can use any temp sensing wire, including combinations (e.g. SS wrapped with kanthal). --------------------------------------------------------------
If anyone has suggestions, improvements, bugs, or anything else, please reach out in the comments below and/or leave a review. New update coming soon!! Thanks!
Here are the available color options. Let me know if you have requests for others:
9,868 downloads
-
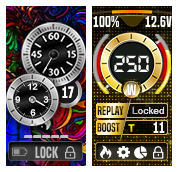
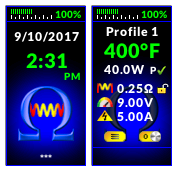
🔥🔥🔥 ⚡️PRO VAPERS + Auto Fire / Charts / Action Center / Multi UI
By aMirS
This is an enhanced theme for Evolv DNA color devices. Exposing the full capabilities Priority and care were given to make this theme as clean, functional and intuitive as possible. For designing This theme, numbers of existing theme were studied and their strengths were noted. There are many many hidden fields and functions. Minimum used space (Off-Board memory and On-Board memory usage) Easy Temp & Watt, Replay, Preheat ,Boost and SESSION mode (Auto Fire) Control.
Please submit your innovative ideas to improve the "Pro Vapers" theme project.
Download Theme Manual:
You can download the theme manual to get acquainted with all the features. Includes a guide to the features and additional information of the "Pro Vapers".
Pro.Vapers_Manual_EN.pdf
Watch Highlights Video: (updated)
You can watch all the different and unique features of the "Pro Vapers" theme on YouTube.
https://youtu.be/aEq-EMRAgBU
Theme Full Info:
Customization Manual & Resources: (Include devices logo, backgrounds & icons)
Versions Info: (SCREENSHOTS)
Other Themes based on Pro Vapers: (Include 5 themes)
Description for Translate.txt
Please submit your reviews to support "Pro Vapers" theme project.
Hope everyone enjoys!
8,921 downloads
-
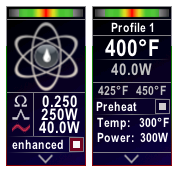
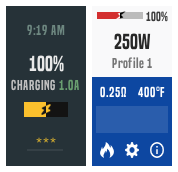
Evolv DNA 75C and 250C Enhanced Default Theme with Replay
This is an enhanced version of the stock default DNA 75C / 250C theme. A lot of changes and some new screens, exposing the full capabilities of the chip, while keeping with the stock look and feel. Priority and care were given to make this theme as clean, functional and intuitive as possible. Now supports international firmware's Boost and Replay functions, as well as all features of the DNA 250C chip.
Hope everyone enjoys!
7,953 downloads
-
LIGHTRAYS_ecigtheme.991b1431793e26d3f4e1ddc07070976f.png)
Therion 75C - 8 Background Options - UK/AU & US versions
By jakeT
* NEW preheat feature in watts mode for kanthal / non temp control coils *
Please see the release notes below for how to use.
Note: For this feature to work correctly you will need to upload this theme using EScribe Suite 2.0 SP6 (or later) to a device with international firmware 1.1 SP26 (or later). For more information please see here: Early Firmware and Escribe Suite and here: Why international only .
I have made this theme with the aim of including as many settings as possible whilst remaining user friendly.
The text is large enough to see at a short distance but still (hopefully) remains visually appealing.
I started with JCBs therion theme and added elements I liked from various other themes, I've also added a few extra screens to fit in all those settings.
US version: Date format m.d.yy and spelling e.g. atomizer
UK/AU version: Date format d.m.yy and spelling e.g. atomiser
Different backgrounds have different colour schemes, e.g. the mossy green version uses green headings and green highlights etc.
Dark Twilight Light Rays Cloudy Colour Deep Blue Diagonal Blue Mossy Green Ocean
Features / how to use:
~Main Screen~
The two icons toward the middle if the screen are selectable, the left one takes you to Device Monitor and the right takes you to Puff Info. The value below the left icon displays the achieved wattage during the last puff, this is mostly useful for temp control but it can also be useful for battery diagnostic.
The value below the right icon display last puff time. Selecting the coil material (when in temp control) will take you directly to Atomiser Settings. The values at the very bottom are board temperature and battery voltage, useful for quick diagnosis. -Large battery bar on lock screen for quick viewing.
-Dynamic status bar on Lock Screen, Main Screen, Settings Menu, Lock Settings and Device Monitor Settings.
-Lock Screen shows asterisks (**) as you enter your unlock sequence.
-Settings Menu shows the name of the highlighted icon. (Atomiser, Display, Puff Info etc.)
etc.
-Temperature, resistance lock and preheat options will only display when a temperature sensing material is selected. i.e. in plain wattage mode the options for these will disappear.
-Most screens feature a 'Back' or 'Exit' button or a combination of both. 'Back' will take you back to the screen you came from, e.g. if you go to Atomiser Settings from the Settings Menu the back button will take you back to the Settings Menu. If you go to Atomiser Settings by selecting the coil material on the Main Screen, the Back button will take you back to the Main Screen. In all cases the Exit button will take you directly to the Main Screen.
-Black background on the Device Monitor, Diagnostic and Device Info screens to make the text easier to see and read.
-You can alter 'Watts:' and 'Temp:' on the Diagnostic screen.
-Screens you can fire from: Main Screen (obviously), Atomiser Settings, Device Monitor and Diagnostic. Pressing the fire button on any other screen will give the same result as selecting 'Back'. e.g. if you are on the Display Settings screen you can press the fire button twice to go back to the Main Screen- pressing once goes back to the Settings Menu and another press takes you back to the Main Screen.
-Select the graph on the Device Monitor page to access the Device Monitor Settings.
-Time & Date and Lock Settings are accessible from the System Settings screen.
-The 'Display' icon on the Settings Menu changes based on whether stealth mode is enabled or disabled.
-The options for stealth level are 'Off', '1', '2', or '3'.
3 = Screen turns off
2 = Very dim
1 = Dim
Off = Stealth mode is disabled
-Indicator light:
Fade in/out red = charging
Green = charge complete
Blue/purple = firing
Enjoy!
P.S Thank you to all the theme creators whose elements I've ruthlessly and mercilessly pinched. Happy to remove them if it is an issue, just let me know
5,336 downloads
-
replay Material-ish Fire - DNA75c -DNA100c - DNA250c Optimized
Strongly recommend updating to this new version 2.0.0 as it adds new features.
A material colored theme for DNA75c and DNA250c. Customization options far beyond what's featured in the default Evolv theme.
Notes:
You can press the fire button to exit out of a screen that doesn't have a back button. LED colors styled to the theme. When you change the material of a profile (eg. from Watts to SS316L) you won't have the appropriate toggles (eg. Temp Control, Replay) activated right away. You need to back out of the Atomizer Profile screen, fire the mod and go back into the Atomizer Profile screen. This is an Evolv/Theme Designer issue. If you have temp control enabled, you can switch positions of the power and temperature field on the main screen by enabling "Big Temp" in Menu -> Settings In the Atomizer Profile screen you can adjust the Pre-heat temperature either via a Punch gauge or via a Temperature field. You can switch between them with the new toggle next to the Pre-heat label. I made this version with the new DNA250c Paranormals in mind. I think it would look good on the darker ones especially. I'd love to see some handchecks if you're using it on a Paranormal!
Also check out the other version of this theme
10,150 downloads
-
evolv 250c Evolv Default Enhanced 250C Theme
By JMat76
Several modifications keeping the overall default Evolv theme look.
Main screen "Firing" now red when firing as well as all menu or status bars.
On main screen when not in active Replay saved puff you can select the ohm reading to shortcut you to the Coil Info screen.
Settings changed to Menu for new menu / settings platform
Most "Back" buttons removed and scroll up of down off the screen to go to the previous screen.
Watts now adjustable in 1 watt increments instead of .1.
Temp adjustable in 5 degree increments.
New menu platform dived into Profile, Puff Info, Coil Info and Settings on main menu.
New coil install screen now has cold ohm temp for new coil and old coil resistance and temp when deciding on new coil or keeping old settings.
Profile Menu has added cold ohm temp with current ohm reading and coil material setting added. Also added is the availability to have advanced preheat settings with the Preheat+ toggle when temp control is active.
Puff Info screen enhanced with chart and ability to change wattage and or temp for dialing in a perfect puff. Also the addition of several live readings of the last puff. Live ohms, room temp,average power, puff duration, puff volts, puff amps, and average puff temp, and max puff temp when in temp control. When a non-temp sensing coil is installed gives you current battery % instead of temp.
Recording Screen with new additions to be able to monitor with every puff.
New Coil Info screen added with time, battery %, current profile, coil material, cold ohms, live ohms, coil temp, ability to remeasure resistance, and ability to lock ohms.
New settings menu with System, Display, Device, and About.
System gives you date, time, 12 / 24 hr, F or C temp, max puff time and serial number.
New Display menu has brightness adjustment, always on, stealth level, auto lock, auto lock time out, and # of clicks to lock, and ability to set unlock device sequence.
Device screen now has power bank settings, and battery voltages for up to 4 batteries.
About Menu with Lifetime puff count, Theme revision, current firmware, current revision, edition, current puff count, puff count total energy, and reset to take you to a rest statistics screen.
Thanks to everyone on the Evolv forum for ideas and themes to give me inspiration for this theme!
Evolv Default Enhanced 250C.ecigtheme
Evolv Default Enhanced 250C.ecigtheme
6,560 downloads
-
_ecigtheme.a048502650b7a90b9e7176d86ede3e5c.png)
ios The iOS Theme
By Tortuga
The iOS Theme. Available in 4 COLORS.
Recently Updated to 2.1
Made with extra care from scratch, I'm happy to give you The iOS Theme!
The iOS Theme supports Replay on both DNA 75c and DNA 250c boards. This theme utilizes everything a DNA color board has to offer.
This creation was inspired when i saw that big beautiful battery icon of an iPhone while i was vaping. I wanted that for my mod ASAP... and thus my creativity journey begun. Hope you enjoy the result!
Available Colors:
*Colors are based on the default wallpapers for iPhone XS, XS Max and iOS12
iOS12: Space Grey: Silver: Gold:
Main screens:
Temperatute Control (TC): Replay: Regular Wattage mode:
Icon Menus:
Phone: Safari: Messages: iTunes:
Swap Time for Battery %:
Advanced Live recording options with color mapping:
Battery info for up to 4 batteries:
Credits to Apple and their iOS graphics team for the inspiration.
9,676 downloads
-
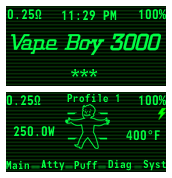
Vapeboy 3000
As frequently requested, the fallout vapeboy 3000 is here! This theme showcases the function of making battery life conditional by making your battery level turn from green to red and the vapeboy's limbs crippling as the level lowers. I hope you all enjoy and as always if you need any help with tips or tricks, don't hesitate to message me.
8,658 downloads
-
Digital
If you like a lot of information on the home screen, and want to adjust preheat / boost settings from the main screen then you might like this!
All the features present on my previous themes, Gauges and the Material-ish themes, are available on this one too.
Please let me know if you find any bugs / issues. Happy to take feature suggestions too!
Check out my other themes
11,494 downloads
-
![More information about "NEO Cloudz [on Crack™] {DNA250C + DNA75C}"](//forum.evolvapor.com/applications/core/interface/file/index.php?file=/monthly_2021_06/preview.main.e323f06baa19d391.NP20_ecigtheme.cc5c31d0a4bb770ce3beeed65e31dc1e.png)
NEO Cloudz [on Crack™] {DNA250C + DNA75C}
By Skit
This is the most advanced, feature packed vaping experience OR YOUR MONEY BACK!!!
Pick up your vape.
Have a taste of 2077, have some NEO Cloudz.
HATE THIS???
Please fill in the following (very short) feedback form I would really appreciate it, especially if you DON'T want to download this. I want to make this better for everyone!
https://forms.gle/bSKWzHjmYJoyAmrE6
Do you think I have desecrated the holy sanctity of Frank?
This theme didn't used to be this hot 🥵. Think of this version as a spiritual successor to Frank's before, erghmm, it got hooked on all that... pink. Also check this for a more comprehensive change log
Neo Clouds On Crack has Frank at it's very core, hardened and sharpened until it's latest iteration. This.
Dev Style:
I'm a massive h*cking nerd if you couldn't already tell. This theme is themed after a computer terminal as that is where I spent most of my days. I love the minimalist high contrast look and wanted to bring that l33t l00k to not only to just my vape but YOUR vape!
A new version is submitted as I create them. While this means you will get extremely fast updates; this also means you *will* experience bugs and inconsistencies in the UI. Report them if you care. I am only human however meticulous I am.
874 downloads
-
_EN_dna250c_ecigtheme.6bc8b1b21c3fa16d97f69cd0aa9db393.png)
English version
By zark
English version of my best theme
Big thanks to gwyar for help and time spent
711 downloads
-
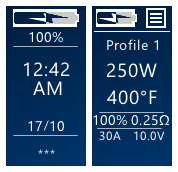
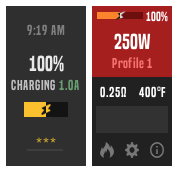
replay Mr. Theo Bottomfeeder Black English/German/Deutsch for DNA 75C/250C - Replay - PowerBank - up to 4 Batterys
This is a old and meanwhile overworked version of my theme.
The actual version, you'll find here:
Four different colorized variants of this theme are availiable too - "Full Color"-, two different "Black&White"- and a "Easy Colors"-Theme - each in english and german availiable - See below in "Other Versions..."
English Description (Deutsche Beschreibung siehe unten)
Theme : "Mr. Theo Bottomfeeder" for DNA 75C/250C
Supports: - Replay - Powerbank - up to 4 Batterys
- English and German GUI-Languages availiable -
This Theme-Version was created by:
Author: Hubert Allgäuer (Alias "Mr. Bottomfeeder"), Lake of Constance, Germany
with using the program:
"EScribe Suite V 2.0 with Service Pack 15.1"
Here my very first Theme for the DNA75C/DNA250C (tested on Therion BF 75C, Rebel BF 75C and Boxer BF DNA250C) available in english and german language.
It is a very comfortable, informative and comprehensive theme in black.
Developed for all who wan't to have knowledge about all parameters of the DNA.
No playful pictures, only information and all parameters of the DNA chip can be called up and displayed. But these are arranged in a unique, easily understandable and intuitive way.
This theme is easy for viewing display in dark and bright background and not just well suited for developers and those who want to have full control over all the settings of the DNA chip but for all usual users as well.
(The error in the lock-screen what is shown here in the Overview doessn‘t exist in real theme - see pic below.
Hoping everything works well - if you find some problems or malfunctions or having wishes or questions, please feel free to drop me a note here.
I would appreciate your comments on the usability of this theme, what you think about this theme, your suggestions for improvement and your wishes for furter updates.
Wish to have fun with this theme
Greetings
Mr. Bottomfeeder
Information:
For using the Theme "Mr. Theo Bottomfeeder >= V 1.8.0" and the new Replay-Mode, you need the following Firmware on your Device. Otherwise this Theme can not be installed.
Needed Firmware on the device: "1.1 SP 33.2 INT" or later version
You can download Theme "Mr. Theo Bottomfeeder V.1.7.0" if you don't have a actual firmware on your device. Themes until V1.8.0 don't have a integrated Replay-Mode and works with older Firmwares.
Selecting Mainscreen (Mainscreen 1 or Mainscreen 2 - Bad Eyes)
Specifying which screen is defined as Mainscreen by de-/activating the button "Mainscreen" in the screen "Display" (Red = Mainscreen 1, Green = Mainscreen 2 "Bad Eyes")
Mainscreen 1 and Mainscreen 2 "Bad Eyes":
Upper side left: Percent-Value >>clicking opens Mainscreen 2 "Bad Eyes" or switches back to Mainscreen 1<<
Upper right side: Voltage-Value >>clicking opens Screen "USB", if connected - otherwise opens screen "Pack"<<
or
Upper side: Pack-Level as graphic bar display >>clicking opens Screen "USB", if connected - otherwise opens screen "Pack"<<
--Selecting what to show: By clicking the button "Pack Main" in the screen "Display"(Red=Numbers, Green=Pack-Level as graphic bar display)--
Voltage-state is displayed in different colors - depending on the battery level (green> = 66%, yellow> = 33% and <66%, red <33%).
Charged full and Pack-Empty-Alert when using is displayed in relevant Screens
++Only in Mainscreen 1++:
Below Pack-Display: Profile and Mode >>clicking one to select a Profile or Mode<<
or
Below Pack-Display: Date and Time >>clicking one opens Screen "System"<<
or
Below Pack-Display: Big Time >>clicking opens Screen "System"<<
--Selecting what to show: By de-/activating the two buttons "In Main" in the screen "System" - Left button = switching Profile and Mode (red) or time display (green), right button = if time display is activated switching between date and time (blue) or big time (yellow)--
or
If firing, a flame symbol appears at this place
++Only in Mainscreen 1++:
Above the lower information line: The contents for output values for the lower three fields can be choosen in Screen "Display":
Left display: Switch "Volt/Watt" - Coil voltage(Red)/coil power(Green)
Right display: Switch "Ampere/Ohm" - Coil current(Red)/Coil Resistant(Green)
Lower display: Switch "Puff/Puffs" - duration of the current Puff(Red) / total number of Puffs since reset(Green)
Symbols (Mainscreen 1 and Mainscreen 2 "Bad Eyes"):
"Lightning" with three modes
1. Grey lightning is displayed in Watt-Mode, if Boost is deactivated or in other Modes Preheat is not activated >>clicking opens Screen "Profile"<<
2. Yellow lightning is displayed in Watt-Mode, if Boost is activated >>clicking opens Screen "Profile"<<
3. Switch (blue and red lightning) is displayed, if Pre-Heat (only in Not-Watt-Modes availiable) is activated >>clicking the lightning switches display between:<<
- Red lightning (switch is Off) and Temp-Control is activated: Upper side Coil-Temperature - Lower side: Pre-Heat-Temperature
- Red lightning (switch is Off) and Temp-Control is deactivated: Upper side Coil-Power - Lower side: Pre-Heat-Temperature
- Blue lightning (switch is On) and Temp-Control is activated: Upper side Pre-Heat-Power - Lower side: Punch-Level
- Blue lightning (switch is On) and Temp-Control is deactivated: Upper side Pre-Heat-Power - Lower side: Punch-Level
--Selecting what to show: If Pre-Heat is activated and depending on whether Temp-Control is on or off, you can toggle the output what is specified here--
"Flame" with two modes >>clicking opens Screen "TC/Pre-Heat"<<
1. Grey flame, if no Pre-Heat is activated
2. Colored flame , if Pre-Heat is activated
"Thermometer" with two modes >>clicking opens Screen "Settings 1"<<
1. Strikethrough, if no activated Temp-Control or coil with no Temp Sensing Material or coil with Temp Sensing Material but no Temp Sensing detected (wrong coil-wire for choosen Profile or coil with contact problems - fluctuating coil-resistance)
2. Colored if actual Profile is Temp-Controlled
"Coil" with six modes >>clicking opens Screen "Info-Power"<<
1. Blue coil with both pins down:
If Boost deactivated and no Temp-Sense-Material and no Temp-Sence Detect (usual Watt-mode)
2. Blue coil with right pin up:
If Boost activated and no Temp-Sense-Material and no Temp-Sense detect (usual Watt-mode with Boost)
3. White coil with both pins down:
If Temp-Control deactivated and Temp-Sense-Material but no Temp-Sense detected (mostly no Temp-Control with Temp Sensing wire - but wrong TC-wire used or contact-problems - - fluctuating coil-resistance)
4. White coil right pin up:
If Temp-Control activated and Temp-Sense-Material but no Temp-Sense detected (mostly Temp-Control with Temp Sensing wire - but wrong TC-wire used or contact-problems - - fluctuating coil-resistance)
5. Red coil both pins down:
If Temp-Sense-Material and Temp-Sense detect but no Temp-Control activated (TC-wire with not activated Temp-Control)
6. Red coil right pin up:
If Temp-Sense-Material and Temp-Sense detected and Temp-Control activated (full working Temp Sensing Mode, TC-wire with activated Temp-Control)
Replay:
Bottom Center: "Replay"-Buttons (like on a Cassette-Recorder).
- Grey: Replay is deactivated
- Halt-Symbol (two red vertical bars): Replay is on
- Record-Symbol (a filled red circle): Replay has recorded a puff and is ready for playing
- Play-Symbol (a filled red triangle): Replay is playing
When Replay is Playing, the words "Replay" and "active" are displayed in big yellow chars in both Mainscreens. Additional a graphic bar display for control Replay warmth is shown.
Mainscreen 1 and Mainscreen 2 "Bad eyes":
Icon below right - Lockscreen (Symbol "Bed") or Mainscreen 1 (Symbol "House") / Mainscreen 2 Screen "Bad Eyes" (Symbol "Glasses")
Function of the lower right symbol in Mainscreen switches the lower right symbol in all screens (except Lockscreen and Mainscreens) either back to Mainscreen 1 or Mainscreen 2 ("Bad Eyes") depending on the selection of the switch "Mainscreen" in the screen "Display". Due to the limitation of the software, the Mainscreen 1 will always be displayed after unlocking the device, even if Mainscreen 2 ("Bad Eyes") is activated as Mainscreen. In this case, the Mainscreen 2 ("Bad Eyes") can be accessed again by simply clicking on the lower right icon.
- Specify which screen is defined as Mainscreen by de-/activating the button "Mainscreen" in the screen "Display" (Red = Mainscreen 1, Green = Mainscreen 2 "Bad Eyes") -
++Only in Mainscreen2++:
While firing, a flame symbol appears instead of the lower six Symbols at this place
All other elements should be self-explanatory.
Origin DNA-Datasheet:
'Replay is intended to capture the flavor and satisfaction of the “perfect puff” and provide the same level of performance and consistency on all subsequent puffs. The use of Nickel, Stainless, Titanium, or other material that increases in resistance when heated is required. In addition, Replay will also prevent dry hits when used with wattage control.
To use Replay set the device to the desired power level and operate it normally. Once a satisfying puff is achieved, activate the feature to save and replay the saved puff each time the device is fired. Puff length is not a factor and the user will not be limited to the length of the previous puff. Disable Replay to resume normal operation or find a new puff to save. If Replay cannot be enabled the coil is not compatible. '
(Source: https://downloads.evolvapor.com/dna75color.pdf)
Activating Replay-Mode:
The Replay-Mode is changeable seperately for each Profile.
It can be activated directly in this theme, if choosing in the "Replay"-Page ("Menu 1" - "Replay").
Also the activation of the Replay-Mode can be done in the Profile-Settings in the EScribe-Program and uploading the changed Profile-Settings onto your device then.
If the Replay-Mode is activated, the standard grey Replay-Symbol on both Main-Pages of this theme is changing into a "Halt"-Symbol (two red standing bars - similar the "Halt"-Button on a tape-machine).
Recording a puff for Replay:
If the Replay-Mode is activated, you have to puff some times for initializing the Replay-Mode.
As soon the Replay-Mode is prepared for recording a puff, the "Halt"-Symbol on Mainscreen changes into a red filled circle (like the "Record"-Button on a tape-machine).
Now you can click the "Record"-Symbol after you had a puff that fully meets your expectations.
Play a recorded puff in Replay (always repeated):
As soon, as a puff is recorded, the Replay-Symbol changes into a red Triangle "Play"-Symbol (also like the "Play"-Button on a Tape-Machine).
Additionally the word "Repeat" is displayed in big yellow chars on both Main-Screens of the Theme.
That shows, the previous recorded puff will be repeated endless now.
Stop Replay-Mode:
For ending the Replay-loop, just click onto the red "Play"-Symbol.
The yellow "Replay"-Name dissappears from the Main-Screens and the Replay-Symbol changes back into the red filled Circle "Record"-Symbol.
The Device went back into normal using-mode now.
By clicking the "Record"-Symbol again, the last puff will be saved and the Replay-Mode changes into the Play-Mode.
BE AWARE!
Don't activate the checkbox "Puff saved, playing" in the Profile-Settings of your EScribe-Program.
Just activate the checkboxes "Use replay on this profile".
If activating the checkboxes "Puff saved, playing" at this point, the Replay mode would be activated - but without a recorded favourite puff, what could cause malfunctions.
History:
1.7.0 Version without Replay-Mode for older firmware-Devices
1.8.0 Implemented Replay-Mode (DNA 75C and DNA 250C)
1.8.1 Implemented in Screen "Pack" Power-Bank function settings (only DNA 250C)
1.8.2 Moved Power-Bank function settings into USB-Screen now (only DNA 250C)
1.8.3 Implemented in Screen "Pack" displaying different Voltages from up to 4 Batterys in the device
1.8.4 Voltage fields repaired - will be displayed correct now, if >10V.
1.8.5 Now voltages on DNA75C-devices with 2 Decimal Places, on DNA250C-devices with 1 Decimal Place
1.8.6 Bugfixes and switchable Outputs "Voltage or Ampere" and "Wattage or Ohms) for Mainscreen (chooseable in "Menu 1" - "Display")
1.8.7 Splitted switches for "Volt or Watt" and "Ampere or Ohm" and "Puff Duration or Puff Count" in Mainscreen (chooseable in "Menu 1" - "Display")
1.8.8 Minor Bugfixes
1.8.9 Pre-Head-Symbol integrated
1.9.0 In Lockscreen different Symbols for USB/Data-Connection/Powerbank
1.9.1 Bugfix: Translations and repaired too small fields, if using unit °F
1.9.2 Bugfix for show "Playing"
1.9.3 Symbol "P" for "Punch" moved from right "Flame"-symbol into left "Lightning"-Symbol
1.9.4 Added adjustable Boost-Level and Punch-Level in Mainscreen 1 and Mainscreen2(Bad Eyes-Screen)
1.9.5 Manual switch in "TC/Pre-Heat"-Screen for choosing displayed Pre-Heat-Temp and Pre-Heat-Punch-Level in Mainscreen if Pre-Heat is activated
1.9.6 New switch in Mainscreens for toogle between displaying Punch-Level and Temperature if Prehead is active
1.9.7 Overworked Screen "TC/Pre-Heat" and Mainscreens
1.9.8 Added Slider for Warmth on Mainscreens. Is shown, if Replay is active
1.9.9 Screen "Coil-Power" replaced by screen "Profile"
2.0.0 Mainscreens displaying of "Replay" improved
2.0.1 Minor Bugfixes
2.0.2 Switch for Toogle Punch-Values in Mainscreen now is red and blue Lightning, Switch added in screen "Profile" for Pre-Heat On/Off
2.0.3 Minor Bugfixes
2.0.4 Minor changes
2.0.5 Bugfix "Pack empty" and "Replay active" is displayed correct now in Mainscreens, minor changes stepsize optimized for some values
2.0.6 Bugfix: Repaired switching back from Screen "Bad Eyes" to "Mainwindow" - Addition: Alternative Pack-Level as graphic bar display in both Mainscreens. Button in Screen "Display" - Switch "Pack Main" for displaying either Digital Values for Pack-Level and Pack-Voltage or Pack-Level as graphic bar display
2.0.7 Bugfix: Displaying text "Pack" ("full", "empty") in Mainwindow and screen "Bad Eyes" now works
2.0.8 Bugfix: Voltage in Mainwindow and screen "Bad Eyes" now shown in only one line as well if voltage >= 10V, Border lines in all windows removed, because not exactly placed displays shows this problem with border lines
2.0.9 Minor Bugfixes: Now "Pack full" doessn't appears after connecting USB-Wire - - Improvement: This manual, Structure of some screens, Battery icon in Lockscreen now shows in color the charge level - Addition: Displaying Profile and Mode in "Mainscreen 1" now is exchangeable into displaying Date and Time or big Time by activating in screen "System" the two new buttons "In Main" - Selecting by de-/activating the button "In Main" in the screen "System" - Left button = switching Profile and Mode (red) or time display (green), right button = if time displaying is activated switching between date and time (blue) or big time (yellow)
2.1.0 Bugfix: Bar-Display for Battery level repaired on screen "Bad Eyes", Improvement: Screen "Menu 1" improved, Addition: Function of bottom right icon in Mainscreen is now switchable between "Lockscreen" and Screen "Mainscreen 1" or "Mainscreen 2" (Screen "Bad Eyes") by de-/activating button "Off in Main" in Screen "Display" .
2.1.1 Smaller and bigger bugfixes, Improvement: "Mainscreen 1" click on voltage-display opens screen "USB" if connected, if not connected click opens screen "Pack" - graphic bar-display for battery_level now also with "Pack empty" -Warning and click opens screen "USB" when connected when not connected click opens screen "Pack", Screen "Menu 1" entry "Profiles / Coil" splitted, Screen "Coil" completely reworked, Screen "Info Temp / Ohm" entry "Board Temperature" added, Screen "About" entry "mWh since reset" added
2.1.2 Improvement: Fixed selection of the Mainscreen (Mainscreen 1 or Mainscreen 2 "Bad Eyes") is possible now. Depending on the selection of the "Mainscreen" button in the "Display" screen, the lower right icon in all screens now switches back to either Mainscreen 1 or Mainscreen 2 ("Bad Eyes"). Due to the limitation of the software, the Mainscreen 1 will always be displayed after unlocking the device, even if Mainscreen 2 ("Bad Eyes") is activated as mainscreen. In this case, the Mainscreen 2 ("Bad Eyes") can be accessed again by simply clicking on the lower right icon.
2.1.3 Bug fix: In screen "Lock/Unlock" now the setting for "Auto-Lock" delay time works correct, small further errors eliminated.
Improvement: Screen "New Coil" optimized, in Screen "Display" the text boxes now show the state of the switch-settings, in both Mainscreens the graphic bar display for Replay-Heat embellished.
-> And now the moment seems to has come where I can't find other possible improvements for this theme anymore (and the memory of the DNA is almost full with this theme-version - 99.2%) - but I am now thinking about developing a new theme with less information and more artistic elements.
P.S. There are month of work in this theme. Therefore, I would appreciate a small donation from those who love this theme so much that they like to use it. Many Thanks
My PayPal-Mail-Address is: eBoy@lake-of-konstanz.de
Availiable Versions(each in English and German):
- Mr. Theo Bottomfeeder Black - Full Color - all Screens are full colorized
- Mr. Theo Bottomfeeder Black - Easy Colors - text-fields in all screens yellow and white, but Mainwindows stays colorized
- Mr. Theo Bottomfeeder Black - Nearly Black and White - text-fields in all screens mostly monochrome, but Mainwindows stays colorized
- Mr. Theo Bottomfeeder Black - Pure Black and White - all text-fields in all screens monochrome in white also in Mainwindows
----------------------------------------------------------------------
Dies ist eine inzwischen veraltete und nicht mehr aktuelle Version meines Themes
Die aktuelle und komplett überarbeitete Version findet Ihr hier:
Vier verschieden kolorierte Varianten dieses Themes sind hier verfügbar - "Full Color"-, zwei verschiedene "Black & White"- und ein "Easy Colors"-Themen - jeweils in Englisch und Deutsch verfügbar - siehe unten in "Verfügbare Versionen"
Deutsche Beschreibung (English Description see upper text)
Theme: "Mr. Theo Bottomfeeder" für DNA 75C/250C
Unterstützt: - Replay - Powerbank - bis zu 4 Akkus
- Englische und deutsche GUI-Sprachen verfügbar -
Diese Theme-Version wurde erstellt von:
Autor: Hubert Allgäuer (Alias "Mr. Bottomfeeder"), Bodensee, Deutschland
mit dem Programm:
"EScribe Suite V 2.0 mit Service Pack 15.1"
Hier mein erstes Theme für die DNA 75C/DNA250C (getestet mit Therion BF 75C, Rebel BF 75C und Boxer BF DNA250C) in englischer und deutscher Sprache.
Es ist ein sehr komfortables, informatives und umfassendes Theme in Schwarz.
Entwickelt für alle, die über sämtliche Parameter der DNA Bescheid wissen wollen.
Keine verspielten Bildchen, nur Informationen und sämtliche Parameter des DNA-Chips abrufbar und angezeigt. Aber diese dafür in einzigartiger Weise leicht verständlich und intuitiv bedienbar arrangiert.
Dieses Theme ist in dunkler und heller Umgebung leicht abzulesen und nicht nur gut geeignet für Entwickler und diejenigen, die die volle Kontrolle über alle Einstellungen des DNA-Chips haben wollen, sondern auch für alle normalen Benutzer.
(Der Fehler im Lock-Screen, welcher hier in der Übersicht angezeigt wird, existiert es im realen Theme nicht - siehe Bild unten.
Ich hoffe, dass alles gut funktioniert - wenn Ihr Probleme oder Fehlfunktionen feststellt oder Wünsche oder Fragen habt, können Ihr mir gerne eine Nachricht hinterlassen.
Über Eure Kommentare zur Brauchbarkeit dieses Themes würde mich mich sehr freuen, auch über Eure Meinung zu diesem Theme, über Verbesserungsvorschläge und Eure Wünsche für künftige Updates.
Viel Spaß mit diesem Theme
Beste Grüße
Mr. Bottomfeeder
Information:
Zur Verwendung des Themes "Mr. Theo Bottomfeeder> = V 1.8.0" und des neuen Replay-Modus benötigt Ihr folgende Firmware auf Eurem Gerät. Ansonsten kann dieses Theme nicht installiert werden.
Benötigte Firmware auf dem Gerät: "1.1 SP 33.2 INT" oder höhere Version.
Ihr könnt das Theme "Mr. Theo Bottomfeeder V.1.7.0" herunterladen, wenn Ihr keine aktuelle Firmware auf Eurem Gerät habt. Themes vor V1.8.0 haben keinen integrierten Replay-Modus und arbeiten daher auch mit älterer Firmware.
Auswahl des Mainscreens (Mainscreen 1 oder Mainscreen 2 - "Bad Eyes")
Festlegen, welche Screen als Mainscreen definiert wird, durch De-/Aktivieren der Schaltfläche "Mainscreen" im Screen "Anzeige" (Rot = Mainscreen 1, Grün = Mainscreen 2 "Bad Eyes")
Mainscreen 1 und Mainscreen 2 "Bad Eyes":
Oben links: Akku-Level in Prozent >>Klick öffnet Mainscreen 2 "Bad Eyes" bzw. schaltet zurück auf Mainscreen 1<<
Rechts oben: Akku-Spannung >>Klick öffnet Screen "USB", wenn verbunden - andernfalls wird Screen "Akku" geöffnet<<
oder
Oben: Graphische Balken-Anzeige für Akku-Level >>Klick öffnet Screen "USB", wenn verbunden - andernfalls wird Screen "Akku" geöffnet<<
--Auswählen was angezeigt werden soll: Durch Anklicken der Schaltfläche "Akku Main" im Screen "Display" (Rot=Zahlen, Grün=Graphische Balken-Anzeige für Akku-Level)--
Der Akkuzustand wird in verschiedenen Farben angezeigt - abhängig vom Akku-Level (Grün >= 66%, Gelb >= 33% und <66%, Rot < 33%)
Der Akku-Voll- und Akku-Leer-Alarm wird bei der Verwendung in den entsprechenden Screens angezeigt
++ Nur in Mainscreen 1++:
Unterhalb der Akku-Anzeige: Profil und Modus >>eines Anklicken zur Auswahl eines Profils oder Modus<<
oder
Unterhalb der Akku-Anzeige: Datum und Uhrzeit >>eines Anklicken öffnet Screen "System"<<
oder
Unterhalb der Akku-Anzeige: Grosse Uhrzeit >>Anklicken öffnet Screen "System"<<
--Auswählen was angezeigt werden soll: durch De-/Aktivieren der zwei Schaltflächen "In Main" im Screen "System" - Linker Button = Umschalten Profil und Modus (rot) oder Zeitanzeige (grün), rechter Button = Bei aktivierter Zeitanzeige Umschalten Datum und Zeit (blau) oder grosse Uhrzeit (gelb)--
oder
Wenn gefeuert wird erscheint stattdessen ein Flammensymbol
++ Nur in Mainscreen 1++:
Über der unteren Informations-Zeile: Die Inhalte für die Ausgabewerte für die unteren drei Felder können im Screen "Anzeige" ausgewählt werden:
Linke Anzeige: Schalter "Volt/Watt" - Coil-Spannung(Rot)/Coil-Leistung(Grün)
Rechte Anzeige: Schalter "Ampere/Ohm" - Coil-Strom(Rot)/Coil-Widerstend(Grün)
Untere Anzeige: Schalter "Zug/Züge" - Dauer des aktuellen Zugs(Rot)/Gesamtanzahl der Züge seit Reset(Grün)
Symbole (Mainscreen 1 und Mainscreen 2 "Bad Eyes"):
"Blitz" mit drei Modi
1. Grauer Blitz wird angezeigt, wenn wenn im Watt-Modus Boost deaktiviert oder in anderen Modi Vorheizen nicht aktiviert ist >>Anklicken öffnet Screen "Profil"<<
2. Gelber Blitz wird angezeigt, wenn wenn im Watt-Modus Boost aktiviert wurde >>Anklicken öffnet Screen "Profil"<<
3. Schalter (blauer oder roter Blitz) wird angezeigt, wenn Vorheizen (nur in Nicht-Watt-Modi verfügbar) aktiv ist >>Umschalten zwischen folgenden Anzeigen durch Anklicken des Blitz-Symbols<<
- Roter Blitz: (Schalter ist ausgeschaltet) und Temp-Control aktiviert: Oben Coil-Temperatur - Unten: Vorheizen-Temperatur
- Roter Blitz: (Schalter ist ausgeschaltet) und Temp-Control deaktiviert: Oben Coil-Leistung - Unten: Vorheizen-Temperatur
- Blauer Blitz: (Schalter ist eingeschaltet) und Temp-Control aktiviert: Oben Vorheizen-Power - Unten: Punch-Level
- Blauer Blitz: (Schalter ist eingeschaltet) und Temp-Control deaktiviert: Oben Vorheizen-Leistung - Unten: Punch-Level
--Auswählen, was angezeigt werden soll: Wenn Vorheizen aktiviert ist, kann abhängig davon, ob Temp-Control ein- oder ausgeschaltet ist, die hier angegebene Anzeige umgeschaltet werden--
"Flamme" mit zwei Modi >>Anklicken öffnet Screen "TC/Vorheizen"<<
1. Graue Flamme, wenn kein Vorheizen aktiviert ist
2. Farbige Flamme, wenn Vorheizen aktiviert ist
"Thermometer" mit zwei Modi >>Anklicken öffnet Screen "Einstellungen 1"<<
1. Durchgestrichen, wenn keine Temp-Control oder Coil ohne Temp Sensing Material oder Coil mit Temp Sensing Material aktiviert wurde, aber keine Temp Sensing erkannt wurde (falscher Coildraht für gewähltes Profil oder Verdampfer mit Kontakt-Problem - schwankender Coil-Widerstand)
2. Farbig, wenn Temp-Control aktiviert ist
"Wicklung" mit sechs Modi >>Anklicken öffnet Screen "Info-Power"<<
1. Blaue Wicklung mit beiden Pins nach unten:
Wenn Boost deaktiviert ist und kein Temp-Sense-Material und kein Temp-Sence-Detect (üblicher Watt-Modus)
2. Blaue Wicklung mit rechtem Pin nach oben:
Wenn Boost aktiviert ist und kein Temp-Sense-Material und kein Temp-Sense-Detect (üblicher Watt-Modus mit Boost)
3. Weiße Wicklung mit beiden Pins nach unten:
Wenn Temp-Control deaktiviert aber Temp-Sense-Material, aber kein Temp-Sense erkannt wurde (meistens kein Temp-Control mit Temp-Sensing-Draht - aber falscher TC-Draht verwendet oder Verdampfer mit Kontaktproblem - schwankender Coil-Widerstand)
4. Weiße Wicklung mit rechtem Pin nach oben:
Wenn Temp-Control aktiviert und Temp-Sense-Material, aber kein Temp-Sense erkannt wurde (meistens Temp-Control mit Temp-Sensing-Draht - aber falscher TC-Draht verwendet oder Verdampfer mit Kontaktproblem - schwankender Coil-Widerstand)
5. Rote Wicklung mit beiden Pins nach unten:
Wenn Temp-Sense-Material und Temp-Sense erkannt werden, aber keine Temp-Control aktiviert ist (TC-Draht aber nicht aktivierter Temp-Control)
6. Rote Wicklung mit rechtem Pin nach oben:
Wenn Temp-Sense-Material und Temp-Sense erkannt werden und Temp-Control aktiviert ist (voll funktionierender Temp-Sensing-Modus, TC-Draht mit aktivierter Temp-Control)
Replay:
Unten Mitte: "Replay" -Buttons (wie bei einem Kassetten-Recorder).
- Grau: Replay ist deaktiviert
- Stop-Symbol (zwei rote vertikale Balken): Replay ist aktiviert
- Record-Symbol (ein gefüllter roter Kreis): Replay hat einen Zug aufgezeichnet und ist bereit zum Abspielen
- Play-Symbol (ein gefülltes rotes Dreieck): Replay wird abgespielt
Während der Wiedergabe werden die Wörter "Replay" und "aktiviert" in großen gelben Zeichen auf beiden Mainscreens angezeigt. Zusätzlich wird eine Balken-Anzeige für die Einstellung der Replay-Wärme eingeblendet.
Mainscreen 1 und Mainscreen 2 "Bad eyes":
Symbol unten rechts - Lockscreen (Symbol "Bett") oder Mainscreen 1 (Symbol "Haus") / Mainscreen 2 Screen "Bad Eyes" (Symbol "Brille")
Funktion des unteres rechtes Symbols in Mainscreen schaltet abhängig von der Auswahl des Schalters "Mainscreen" im Screen "Anzeige" das untere rechte Symbol in allen Screens (ausser Lockscreen und Mainscreens) entweder zurück auf Mainscreen 1 oder Mainscreen 2("Bad Eyes"). Bedingt durch die Limitation der Software wird nach dem Unlock des Gerätes immer das Mainscreen 1 angezeigt, auch wenn Mainscreen 2 ("Bad Eyes") als Mainscreen aktiviert ist. In diesem Fall kann das Mainscreen 2 ("Bad Eyes") durch einfaches Anklicken des unteren rechten Symbols wieder aufgerufen werden.
-- Festlegen, welche Screen als Mainscreen definiert wird, durch De-/Aktivieren der Schaltfläche "Mainscreen" im Screen "Anzeige" (Rot = Mainscreen 1, Grün = Mainscreen 2 "Bad Eyes")--
++ nur in Mainscreen 2 ("Bad Eyes")++:
Während gefeuert wird erscheint statt der sechs unteren Symbolen ein Flammensymbol
Alle anderen Elemente sollten selbsterklärend sein.
Origin DNA-Datenblatt(Übersetzung):
"Replay soll den Geschmack und die Zufriedenheit des 'perfekten Puffs' erfassen und bei allen folgenden Zügen die gleiche Leistung und Konsistenz bieten. Die Verwendung von Nickel, Edelstahl, Titan oder einem anderen Material, das den Widerstand beim Erhitzen erhöht, ist erforderlich. Darüber hinaus verhindert Replay bei Verwendung der Wattzahlkontrolle auch das Auftreten von Trockenschlägen (Dry-Hits).
Um Replay zu verwenden, stellen Sie das Gerät auf die gewünschte Leistungsstufe ein und betreiben Sie es normal. Sobald ein zufriedenstellender Zug erreicht ist, aktivieren Sie die Funktion zum Speichern und Wiedergeben des gespeicherten Zuges jedes Mal, wenn die Feuertaste betätigt wird. Die Länge des Puffs ist kein Faktor und der Benutzer ist nicht auf die Länge des vorhergehenden Puffs beschränkt. Deaktivieren Sie Replay, um den normalen Betrieb fortzusetzen oder einen neuen Puff zum Speichern zu finden. Wenn Replay nicht aktiviert werden kann, ist die Coil nicht kompatibel."
(Quelle: https://downloads.evvolpapor.com/dna75color.pdf)
Replay-Modus aktivieren:
Der Replay-Modus ist für jedes Profil einzeln änderbar.
Es kann direkt in diesem Theme aktiviert werden, wenn diese Funktion in der "Replay"-Screen ("Menu 1" - "Replay") aktiviert wird.
Auch kann die Aktivierung des Replay-Modus in den Profil-Einstellungen im EScribe-Programm erfolgen und dann die geänderten Profil-Einstellungen auf das Gerät hochgeladen werden.
Wenn der Replay-Modus aktiviert ist, wechselt das graue Standard-Replay-Symbol auf beiden Main-Pages dieses Themes in ein "Stop" -Symbol (zwei rote stehende Balken - ähnlich dem "Pause" -Button auf einem Cassetten-Recorder) .
Aufnahme eines Zugs für Replay:
Wenn der Replay-Modus aktiviert ist, müssen Sie einige Male dampfen, um den Replay-Modus zu initialisieren.
Sobald der Replay-Modus für die Aufnahme eines Zugs vorbereitet ist, wechselt das "Pause"-Symbol auf dem Mainscreen in einen roten gefüllten Kreis (wie der "Aufnahme" -Button auf einem Cassetten-Recorder).
Jetzt können Sie das "Aufnahme" -Symbol Anklicken, nachdem Sie einen Zug hatten, der Ihre Erwartungen voll erfüllt.
Wiederholen eines aufgezeichneten Zugs in Replay (wird immer wiederholt):
Sobald ein Zug aufgezeichnet wird, verwandelt sich das Replay-Symbol in ein rotes Dreieck "Play" -Symbol (auch wie der "Play" -Button auf einem Cassetten-Recorder).
Zusätzlich werden die Worte "Replay" und "aktiviert" in großen gelben Zeichen auf beiden Mainscreens des Themes angezeigt.
Das zeigt an, dass der vorher aufgezeichnete Zug nun endlos wiederholt wird.
Beenden/Unterbrechen des Replay-Modus:
Um den Replay-Loop zu beenden, klicken Sie einfach erneut auf das rote "Play" -Symbol.
Der gelbe "Replay"-Name verschwindet von den Mainscreens und das Replay-Symbol wechselt zurück in den rot gefüllten Kreis "Aufnahme"-Symbol.
Das Gerät ist jetzt wieder in den normalen Benutzungsmodus zurückgekehrt.
Durch erneutes Anklicken des "Aufnahme"-Symbols wird der letzte Zug gespeichert und der Replay-Modus wechselt in den Play-Modus.
VORSICHT!
Aktivieren Sie in den Profil-Einstellungen Ihres EScribe-Programms nicht die Checkbox "Puff saved, playing".
Aktivieren Sie einfach die Kontrollkästchen "Use replay on this profile".
Wenn Sie an dieser Stelle die Checkboxen "Puff saved, playing" aktivieren, wird der Replay-Modus aktiviert - allerdings ohne einen aufgezeichneten Lieblings-Puff, was zu Fehlfunktionen führen kann.
Historie:
1.7.0 Version ohne Replay-Modus für Geräte mit älterer Firmware
1.8.0 Implementierter Replay-Modus (DNA 75C und DNA 250C)
1.8.1 Implementiert in Akku-Screen Power-Bank-Funktionseinstellungen (nur DNA 250C)
1.8.2 Power-Bank-Funktionseinstellungen jetzt in USB-Screen verschoben (nur DNA 250C)
1.8.3 Im Akku-Screen Akku-Anzeige implementiert, die verschiedene Spannungen von bis zu 4 Akkus im Gerät anzeigt
1.8.4 Spannungsfelder repariert - wird jetzt korrekt angezeigt, wenn > 10V.
1.8.5 Jetzt Spannungen an DNA75C-Geräten mit 2 Dezimalstellen, auf DNA250C-Geräten mit 1 Dezimalstelle
1.8.6 Bugfixes und schaltbare Ausgänge "Volt oder Ampere" und "Watt oder Ohm" für MainScreen (wählbar in "Menu 1" - "Display")
1.8.7 Geteilte Schalter für "Volt oder Watt" und "Ampere oder Ohm" und "Zug-Dauer oder Zug-Anzahl" im Mainscreen (wählbar in "Menü 1" - "Anzeige")
1.8.8 Kleinere Bugfixes
1.8.9 Vorheizen-Symbol integriert
1.9.0 Im Sperr-Screen verschiedene Symbole für USB/Datenverbindung/Powerbank
1.9.1 Bugfix: Übersetzungen und reparierte zu kleine Felder, wenn Einheit °F verwendet wurde
1.9.2 Bugfix für die Anzeige "Playing"
1.9.3 Symbol "P" für "Punch" wurde vom rechten "Flame" -Symbol in das linke "Lightning" -Symbol verschoben
1.9.4 Anzeige von Boost-Level und Punch-Level in MainScreen 1 und MainScreen2 (Bad Eyes-Screen) hinzugefügt
1.9.5 Manuelle Umschaltung im "TC/Vorheizen"-Screen zur Auswahl der angezeigten Vorheizen-Temp- und Vorheizen-Punch-Level im Mainscreen, wenn Vorheizen aktiviert ist
1.9.6 Neuer Schalter in den Mainscreens für die Anzeige von Punch-Level und -Temperatur, wenn Vorheizen aktiv ist
1.9.7 Überarbeitete Screen "TC/Vorheizen" und Mainscreen
1.9.8 Hinzugefügt Slider für Replay-Wärme auf Mainscreens. Wird angezeigt, wenn Replay aktiv ist
1.9.9 Screen "Coil-Power" ersetzt durch Screen "Profil"
2.0.0 Die Mainscreen-Anzeige von "Replay" wurde verbessert
2.0.1 Kleinere Bugfixes
2.0.2 Schalter für Umschaltung Punch-Werte im Mainscreen ist nun roter und blauer Blitz, Schalter in dem Screen "Profil" für Vorheizen Ein/Aus hinzugefügt
2.0.3 Kleinere Bugfixes
2.0.4 Geringfügige Änderungen
2.0.5 Bugfix "Akku leer" und "Replay aktiv" wird jetzt korrekt in Mainscreens angezeigt, kleinere Änderungen werden für bestimmte Werte optimiert
2.0.6 Bugfix: Repariertes Zurückschalten vom Screen "Bad Eyes" auf "Mainwindow" - Zusatz: Alternative Anzeige für Akku-Level in beiden Mainscreens. Schaltfläche im Screen "Display" - Neuer Schalter "Akku Main" im Screen "Display" zur Anzeige von entweder digitalen Werten für Akku-Level und Akku-Voltage oder graphische Balken-Anzeige für Akku-Level
2.0.7 Bugfix: Anzeige des Textes "Akku" ("full", "empty") im Mainscreen und Screen "Bad Eyes" funktioniert jetzt
2.0.8 Bugfix: Spannung im Mainscreen und Screen "Bad Eyes" wird nun auch in nur einer Zeile angezeigt, wenn Spannung> = 10V, Randlinien in allen Screens entfernt, da nicht genau platzierte Displays diesen Montagefehler mit Randlinien sichtbar machten
2.0.9 Kleinere Bugfixes: "Akku voll" erscheint nicht direkt mehr nach dem Verbinden mit USB-Kabel - Verbesserungen: Diese Anleitung, Struktur einiger Screens, Akkusymbol in Lockscreen zeigt jetzt farbig den Ladelevel an - Erweiterung: Die Anzeige von Profil und Modus in "Mainscreen 1" kann nun durch die Aktivierung der zwei neuen Buttons "In Main" im Screen "System" in die Anzeige von Datum und Uhrzeit oder grosse Uhrzeit umgeschaltet werden - Linker Button = Umschalten Profil/Modus (rot) oder Zeitanzeige (grün), rechter Button = Bei aktivierter Zeitanzeige Umschalten Datum und Zeit (blau) oder grosse Uhrzeit (gelb).
2.1.0 Bugfix: Balken-Anzeige für Akku-Level im Screen "Bad Eyes" repariert, Verbesserung: Screen "Menu 1", Zusatz: Funktion des unteres rechtes Symbols in Mainscreen ist jetzt umschaltbar zwischen "Lockscreen" und "Mainscreen 1" bzw. "Mainscreen 2"(Screen "Bad Eyes") durch De-/Aktivieren der Schaltfläche "Aus in Main" im Screen "Anzeige".
2.1.1 Kleinere und grössere Bugfixes, Verbesserung: "Mainscreen 1" Klick auf Spannungs-Anzeige öffnet Screen "USB" wenn verbunden, wenn nicht verbunden öffnet Klick Screen "Batterie" - graphische Balken-Anzeige für Batterie_Level jetzt auch mit "Akku leer"-Warnung und Klick öffnet Screen "USB" wenn verbunden, wenn nicht verbunden öffnet Klick Screen "Batterie", Screen "Menu 1" Eintrag "Profile / Coil" getrennt, Screen "Coil" komplett überarbeitet, Screen "Info Temp/Ohm" Eintrag "Board-Temperatur" hinzugefügt, Screen "Über" Eintrag "mWh seit Reset" hinzugefügt
2.1.2 Verbesserung: Feste Auswahl des Mainscreens möglich (Mainscreen 1 oder Mainscreen 2 "Bad Eyes") ist jetzt möglich. Abhängig von der Auswahl des Schalters "Mainscreen" im Screen "Anzeige" schaltet nun das unter rechte Symbol in allen Screens entweder zurück auf Mainscreen 1 oder Mainscreen 2("Bad Eyes"). Bedingt durch die Limitation der Software wird nach dem Unlock des Gerätes immer das Mainscreen 1 angezeigt, auch wenn Mainscreen 2 ("Bad Eyes") als Mainscreen aktiviert ist. In diesem Fall kann aber das Mainscreen 2 ("Bad Eyes") durch einfaches Anklicken des unteren rechten Symbols wieder aufgerufen werden.
2.1.3 Fehlerbeseitigung: In Screen "Ent-/Sperren" funktioniert nun die Einstellmöglichkeit für "Auto-Lock" Verzögerungszeit, kleine weitere Fehler beseitigt.
Verbesserung: Screen "Neuer Coil" optimiert, in Screen "Anzeige" zeigen die Textfelder nun den Status der dortigen Schalter-Stellungen an, in beiden Mainscreens die graphische Balken-Anzeige für Replay-Wärme verschönert.
-> Und nun scheint der Augenblick gekommen zu sein, an dem mir keine weitere mögliche Verbesserungen für dieses Theme einfallen (und der Speicher des DNA ist mit dieser Theme-Version nahezu erschöpft - 99.2%) - aber ich überlege nun, ein neues Theme mit weniger Informationen und mehr künstlerischen Elementen zu entwickeln.
P.S. In diesen Theme stecken Monate an Arbeit. Daher würde ich mich über eine kleine Spende von denjenigen sehr freuen, die dieses Theme so toll finden, dass sie es gerne verwenden. Vielen Dank
Meine PayPal-Mail-Adresse ist: eBoy@lake-of-konstanz.de
Verfügbare Versionen(jeweils Deutsch und Englisch):
- Mr. Theo Bottomfeeder Black - Full Color - alle Textausgaben farbig (sehr buntes Theme)
- Mr. Theo Bottomfeeder Black - Easy Colors - Beide Mainwindows farbige Textfelder, andere Screens Textfelder in gelber und weisser Farbe
- Mr. Theo Bottomfeeder Black - Nearly Black and White - Beide Mainwindows farbige Textfelder, andere Screens Textfelder in weisser Farbe
- Mr. Theo Bottomfeeder Black - Pure Black and White - Beide Mainwindows und andere Screens Textfelder in weisser Farbe
Example for Lockscreen, Mainscreen1 and Mainscreen2 "Bad Eyes"
Beispiel für Lockscreen, Mainscreen1 und Mainscreen2 "Bad Eyes"
Aktual versions:
Aktuelle Versionen:
Mr. Theo Bottomfeeder Black - Pure Black and White - V2.1.3 German for DNA 75C DNA 250C.ecigtheme
Mr. Theo Bottomfeeder Black - Nearly Black and White - V2.1.3 German for DNA 75C DNA 250C.ecigtheme
Mr. Theo Bottomfeeder Black - Easy Colors - V2.1.3 German for DNA 75C DNA 250C.ecigtheme
Mr. Theo Bottomfeeder Black - Full Color - V2.1.3 German for DNA 75C DNA 250C.ecigtheme
Mr. Theo Bottomfeeder Black - Nearly Black and White - V2.1.3 English for DNA 75C DNA 250C.ecigtheme
Mr. Theo Bottomfeeder Black - Pure Black and White - V2.1.3 English for DNA 75C DNA 250C.ecigtheme
Mr. Theo Bottomfeeder Black - Easy Colors - V2.1.3 English for DNA 75C DNA 250C.ecigtheme
Mr. Theo Bottomfeeder Black - Full Color - V2.1.3 English for DNA 75C DNA 250C.ecigtheme
2,402 downloads
-
replay Material-ish Ocean - DNA75c - DNA250c Optimized
Strongly recommend updating to this new version 2.0.0 as it adds new features.
A material colored theme for DNA75c and DNA250c. Customization options far beyond what's featured in the default Evolv theme.
Notes:
You can press the fire button to exit out of a screen that doesn't have a back button. LED colors styled to the theme. When you change the material of a profile (eg. from Watts to SS316L) you won't have the appropriate toggles (eg. Temp Control, Replay) activated right away. You need to back out of the Atomizer Profile screen, fire the mod and go back into the Atomizer Profile screen. This is an Evolv/Theme Designer issue. If you have temp control enabled, you can switch positions of the power and temperature field on the main screen by enabling "Big Temp" in Menu -> Settings In the Atomizer Profile screen you can adjust the Pre-heat temperature either via a Punch gauge or via a Temperature field. You can switch between them with the new toggle next to the Pre-heat label. Also check out the other version of this theme
6,079 downloads
-
Blue Ohm - English/Deutsch
Preheat (Boost) für den Watt-Mode! ---- English versions for countries with date format m/d/yy (U.S.) and d/m/yy (UK/AU) available.
Um Preheat (Boost) für den Watt-Mode nutzen zu können, benötigt ihr EScribe Suite 2.0 SP6 (oder höher). Download hier: https://forum.evolvapor.com/topic/66731-early-firmware-and-escribe-suite/
Bitte beachtet, dass dieses Feature nur auf Geräten mit der internationalen Firmware-Edition funktioniert - die U.S.-Edition ist davon ausgeschlossen.
Falls ihr nicht sicher seid, in meinem Theme wird unter "System-Info" die Version angezeigt - dort muss "INT" stehen.
Die Navigation ist denkbar einfach...
Gefeuert kann vom Main Screen aus, und vom Device Monitor (Aufzeichnungen). Hoch/Runter: durch's Menü scrollen, Werte verändern. Mittlere Taste: auswählen/bestätigen Von allen Seiten gelangt man mit der Feuer-Taste (außer Main Screen und Aufzeichnungen), bzw. dem Zurück-Pfeil, wieder zur vorherigen Seite. Das "Haus-Symbol" bringt einen - ohne Umwege - wieder zum Main Screen. - Auf die Seite "Neue Wicklung" gelangt man automatisch, sobald ein neuer Verdampfer/neue Coil montiert wurde.
- Die Seite "Coil" ist zu erreichen, wenn man auf dem Main Screen den Widerstandswert ansteuert.
- Die Seite "Einstellungen" ist über das Zahnradsymbol zu erreichen.
- Der "Schalter" versetzt das Gerät in den Standby-Modus (Lock Screen).
Die AM/PM-Anzeige verschwindet automatisch wenn das 24-Stunden-Format für die Zeit gewählt wird.
Die Einstellungen für "Stealth" werden erst dann wirksam, wenn das Gerät einmal in den Ruhemodus gegangen ist, oder versetzt wurde.
Stealth Level:
0: Stealth aus 1: Das Display dimmt nur leicht ab 2. Das Display dimmt etwa auf die halbe Helligkeit 3: Das Display schaltet sehr schnell ab (Vorsicht! Nix für langsame Zeitgenossen)
LED im Feuer-Taster:
Blinkt langsam Rot: Gerät wird geladen Grünes Dauerlicht: Akku voll geladen Lila: Feuern
Über Lob, Anregungen, aber auch Kritik, würde ich mich sehr freuen.
Viel Spaß
Andy
(Alle Werte und Bezeichnungen im Screenshot sind nur beispielhaft)
Für eine etwas vergrößerte Ansicht auf's Bild klicken...
1,500 downloads
-
2 choseable mainscreens Mr. Theo Bottomfeeder - My different Theme-Styles - Each in English and German (Deutsch)
Theme-Style-Collection of my Theme "Mr. Theo Bottomfeeder " - all available in English and German (Deutsch)
----------------------------------------------------------------------
Introduction:
----------------------------------------------------------------------
Here is the newest version of my theme "Mr. Theo Bottomfeeder Black" - Available in English and German GUI language. A little more modern, fewer screens and therefore clearer. But all the necessary features of "Mr. Theo Bottomfeeder Black" are included.
INFO: The displayed "AM","PM"-Clock-Errors what are displayed in the upper preview-Screens will not appear in the Theme - that's just a bug in the Forum-Software.
----------------------------------------------------------------------
Short Description - Using of Mainscreens (Full Description see below):
----------------------------------------------------------------------
Power-Profile:
-- Coil-Power, Boost-Level, Resistance, Ohm-Lock, Replay and Replay-Warmth are adjustable in Mainscreens --
Thermometer(Temp-Control): not available(Gray) Flame/Snowflake(Preheat): not available(Gray) Lightning(Display-Switch): Switch Boost On/Off - If "On", Boost-Level can be adjusted in Mainscreens Wick (Status of coil): not available(Gray) Temp-Profile:
-- Coil-Temp, Coil-Power, Preheat-Temp, Preheat-Power Resistance, Ohm-Lock, Replay and Replay-Warmth are adjustable in Mainscreens --
Thermometer(Temp-Control): Switch Temp-Control On(Thermometer) = Temp-Mode / Off(Crossed out Thermometer) = Power-Mode Flame/Snowflake(Preheat): Switch Preheat On(Flame)/Off(Snowflake) Lightning(Display-Switch): Switch displayed/adjustable values either Coil-Temp and Coil-Power or Preheat-Temp and Preheat-Power Wick (Status of coil): OK(Green)/Error(Red) Main-Colors of displayed values in mainscreens (only in the colored Text-Versions No. 1 - 8 and 17 - 20)
Red: Temp-Mode - Coil-Power and Coil-Temp Yellow: Temp-Mode - Preheat-Power and Preheat-Temp Green: Power-Mode - Boost deactivated Light Blue: Power-Mode - Boost activated Orange: While Charging Pack-Level and Pack-Voltage White: Replay active Replay:
Off: Filled red Rectangle On, but still initializing: Two red vertical Bars On, ready for Replay: Red filled Circle Replaying: Red filled Triangle
----------------------------------------------------------------------
Kurz-Anleitung - Benutzen der Mainscreens (Vollständige Anleitung siehe unten):
----------------------------------------------------------------------
Power-Profil:
-- In den Mainscreens sind Coil-Power, Boost-Level, Widerstand, Ohm-Lock, Replay und Replay-Wärme einstellbar --
Thermometer(Temp-Control): Nicht verfügbar(Grau) Flamme/Schneeflocke(Preheat): Nicht verfügbar(Grau) Blitz(Anzeige-Umschalter): Schaltet Boost Ein/Aus - Wenn "Ein", kann der Boost-Level in den Mainscreens geändert werden Wicklung (Zeigt Coil-Status ) Nicht verfügbar(Grau) Temperatur-Profil:
-- In den Mainscreens sind Coil-Temp, Coil-Power, Vorheiz-Temp, Vorheiz-Power, Widerstand, Ohm-Lock, Replay und Replay-Wärme einstellbar --
Thermometer(Temp-Control): Schaltet Temp-Control Ein(Thermometer) = Temperatur-Modus / Aus(DurchgestrichenesThermometer) = Power-Modus Flamme/Schneeflocke: Schaltet Vorheizen Ein(Flamme)/Aus(Schneeflocke) Blitz(Anzeige-Umschalter): Schaltet angezeigte/einstellbare Werte entweder Coil-Temp und Coil-Power oder Vorheiz-Temp und Vorheiz-Power Wicklung (Zeigt Coil-Status): OK(Grün)/Fehler(Rot) Haupt-Farben der Werte in Mainscreens (nur in den Farb-Text-Versionen No. 1 - 8 and 17 - 20)
Rot: Temp-Mode - Coil-Power und Coil-Temp Gelb: Temp-Mode - Vorheiz-Power und Vorheiz-Temp Grün: Power-Mode - Boost deaktiviert Hellblau: Power-Mode - Boost aktiviert Orange: Während des Ladens Akku-Level und Akku-Spannung Weiss: Replay aktiv Replay:
Aus: Gefülltes rotes Quadrat Ein, aber noch nicht initialisiert: Zwei rote senkrechte Balken Ein, bereit für Replay: Roter gefüllter Kreis Replay aktiv: Rotes gefülltes Dreieck
----------------------------------------------------------------------
Versions
----------------------------------------------------------------------
Theme-Variations (all same functions, but different Backgrounds, Fonts and Colors) with their possible Outputs(depending on the settings) - see following pictures
- English GUI = even numbers
- German GUI = odd numbers
• Version A has a lockscreen with Zodiac-Circle, Screen-Backgrounds in Black (No. 1, 2, 5, 6)
• Version B has a "Broken Wall" Lockscreen and Screen-Backgrounds with floral shapes (No. 3, 4, 7, 8 )
• Version C has a "Starshine" Lockscreen and Screen-Backgrounds with blue pattern (No. 17, 18, 19, 20 ) -> No. 20 is Displayed in upper Preview as Default example
• Version A, B and C in "B&W"-Style have in contrast to the standard colored Text-fields all text in White (No. 9, 10, 11, 12, 21, 22, 23, 24)
• Version A, B and C in "Gray"-Style have in contrast to the standard colored Text-fields all text in different gray-colors (No. 13, 14, 15, 16, 25, 26, 27, 28)
I suspect that the versions with colored text output are easier to understand and a little easier to use than the other versions.
But I think that the purist steam fans prefer the black and white and gray versions rather than the other versions colored in chewing gum colors. Even if these variations are not so intuitively understandable. Because these themes don't look that playful.
Or what do you think - which versions do you prefer? I would appreciate a few more comments and / or criticisms on this theme and its versions.
Theme Variationen (alle haben dieselben Funktionen, aber unterschiedliche Hintergründe, Schriftarten und Farben) mit deren möglichen Ausgaben(abhängig der Einstellungen) - siehe folgende Bilder
- Englische GUI = gerade Nummern
- Deutsche GUI = ungerade Nummern
• Version A hat einen Lockscreen mit Tierkreiszeichen, Screen-Hintergrund in schwarz (Nr. 1, 2, 5, 6)
• Version B hat einen "Gebrochene Wand"-Lockscreen, Screen-Hintergrund mit floralen Mustern(Nr. 3, 4, 7, 8 )
• Version C hat einen "Sterne"-Lockscreen, Screen-Hintergrund mit blauem Muster(Nr. 17, 18, 19, 20 ) -> Nr. 20 ist als Default-Beispiel oben in der Vorschau dargestellt
• Version A, B und C in "B&W"-Stil haben anstelle der standardmässig farbigen Textausgaben alle Textfelder in weisser Schrift (Nr. 9, 10, 11, 12, 21, 22, 23, 24)
• Version A, B und C in "Gray"-Stil haben anstelle der standardmässig farbigen Textausgaben alle Textfelder in verschiedenen Grautönen (Nr. 13, 14, 15, 16, 25, 26, 27, 28)
Ich vermute, dass die Versionen mit colorierten Textausgaben leichter verständlich und etewas leichter zu bedienen sind, als die anderen Versionen.
Aber ich denke, dass die puristischen Dampf-Freunde eher die S/W- und die Grau-Versionen bevorzugen, als die in Kaugummi-Farbenen colorierte anderen Versionen. Auch, wenn diese Variationen nicht so intuitiv verständlich sind. Weil diese Themes nicht so verspielt aussehen.
Oder was meint Ihr - welche Versionen bevorzugt Ihr? Über ein paar mehr Kommentare und/oder Kritiken zu diesem Theme und seinen Versionen würde ich mich freuen.
----------------------------------------------------------------------
"Mr. Theo Bottomfeeder LED" - Available in English and German
"Mr. Theo Bottomfeeder LED" - Version A - (No. 1, 2)
Lockscreen - Mainscreen 1 - Mainscreen 2
"Mr. Theo Bottomfeeder LED" - Version B - (No. 3, 4)
Lockscreen - Mainscreen 1 - Mainscreen 2
"Mr. Theo Bottomfeeder LED" - Version C - (No. 17, 18)
Lockscreen - Mainscreen 1 - Mainscreen 2
"Mr. Theo Bottomfeeder Easy Readable" - Available in English and German
"Mr. Theo Bottomfeeder Easy Readable" - Version A - (No. 5, 6)
Lockscreen - Mainscreen 1 - Mainscreen 2
"Mr. Theo Bottomfeeder Easy Readable" - Version B - (No. 7, 8 )
Lockscreen - Mainscreen 1 - Mainscreen 2
"Mr. Theo Bottomfeeder Easy Readable" - Version C - (No. 19, 20 )
Lockscreen - Mainscreen 1 - Mainscreen 2
"Mr. Theo Bottomfeeder LED - Black&White" - Available in English and German
"Mr. Theo Bottomfeeder LED - Black&White - Version A - (No. 9, 10)
Lockscreen - Mainscreen 1 - Mainscreen 2
"Mr. Theo Bottomfeeder LED - Black&White - Version C - (No. 21, 22)
Lockscreen - Mainscreen 1 - Mainscreen 2
"Mr. Theo Bottomfeeder Easy Readable Black&White" - Available in English and German
"Mr. Theo Bottomfeeder Easy Readable Black&White" - Version B - (No. 11, 12)
Lockscreen - Mainscreen 1 - Mainscreen 2
"Mr. Theo Bottomfeeder Easy Readable Black&White" - Version C - (No. 23, 24)
Lockscreen - Mainscreen 1 - Mainscreen 2
"Mr. Theo Bottomfeeder LED Gray" - Available in English and German
"Mr. Theo Bottomfeeder Easy Readable Gray" - Version A - (No. 13, 14)
Lockscreen - Mainscreen 1 - Mainscreen 2
"Mr. Theo Bottomfeeder Easy Readable Gray" - Version C - (No. 25, 26)
Lockscreen - Mainscreen 1 - Mainscreen 2
"Mr. Theo Bottomfeeder Easy Readable Gray" - Available in English and German
"Mr. Theo Bottomfeeder Easy Readable Gray" - Version B - (No. 15, 16)
Lockscreen - Mainscreen 1 - Mainscreen 2
"Mr. Theo Bottomfeeder Easy Readable Gray" - Version C - (No. 27, 28)
Lockscreen - Mainscreen 1 - Mainscreen 2
*** English Description (Deutsche Beschreibung siehe unten) ***
----------------------------------------------------------------------
Supports: 2 choseable Mainscreens - Replay - Powerbank - up to 4 Batteries
----------------------------------------------------------------------
English and German GUI-Languages available - each Language in two versions: Version A with zodiac-lockscreen and black backgrounds, Version B with "broken-wall"-lockscreen and floral screen-backgrounds (see pictures below)
This Theme-Version was created by:
Author: Hubert Allgäuer (Alias "Mr. Bottomfeeder"), Lake of Constance, Germany
with using the program: "EScribe Suite V 2.0 with Service Pack 15.1"
Here my second and completely reworked version of this Theme for the DNA75C/DNA250C (tested on Therion BF 75C, Rebel BF 75C, VT200, Boxer BF DNA250C, Lost Vape Drone BF 250C) available in english and german language.
It is my most comfortable, informative and comprehensive theme so far.
Developed for all who want to have knowledge about all parameters of the DNA.
No playful pictures, only information and all parameters of the DNA chip can be called up and displayed. These are arranged in a unique, easily understandable and intuitive way.
In this Theme, first time the exact status of the coil is determined and, in the event of problems that prevent Temp-Control, the system automatically switches to power mode and the user will be informed by a symbol in Mainscreen about the problem.
The user may select one of two Mainscreens:
Mainscreen 1 "Mad Eye Moody" (bigger chars but less information) and Mainscreen 2 "Hawkeye Pierce" (smaller chars but more information)
This theme is easily viewed in dark and bright background. Well suited for developers and those who want to have full control over all the settings of the DNA chip as well as for all casual users.
Hoping everything works well - if you find some problems or malfunctions or having wishes or questions, please feel free to drop me a note here.
*** I would appreciate your comments on the usability of this topic, your thoughts on this topic, your suggestions for improvement, and your wishes for further updates.
A coder's life almost made up of comments and suggestions! 😉 ***
Wishing you have fun with this theme
Greetings
Mr. Bottomfeeder
P.S.
Many thanks to the user "Wayneo" for his kind help in finding bugs, his hints for improving this Theme and his corrections to improve the readability of this manual!😃😃😃
** The attached files below this manual contains this manual as TXT-File and my favorite selection of 30 Lockscreen-Pictures. **
----------------------------------------------------------------------
Information:
----------------------------------------------------------------------
For using the Theme "Mr. Theo Bottomfeeder LED" with the new Replay-Mode, you need the following Firmware on your Device. Otherwise this Theme can not be installed.
Needed Firmware on the device: "1.1 SP 33.2 INT" or later version
----------------------------------------------------------------------
Manual
----------------------------------------------------------------------
++ General ++
Three different kind of Buttons
• "X" (red cross symbol - not active) and "check mark"(green - Active)
Not switchable - only as pure information for the user about the status of a value
• "Green button" and "Red button"
Switchable button On (green) / Off (red) to switch an option On / Off
• "Blue1 button“ and "Blue2 button“
Switchable button to toggle between two states
++ Screens ++
• Don't be surprised, the "Profile" screen automatically changes between "Temp-Profile" and "Watt-Profile" depending on the selected mode with the appropriate input and selection options.
• All screens only show the elements and setting options that are possible with the current settings.
• A small "Lock"-Symbol in the Mainscreens next to the Ohm-Value allows switching Ohm-Lock-On/Off directly in Mainscreens.
• Automatic fallback to Power-Mode if Temp-Sense error detected
• Information-text in taskbar describes function of each selected element
++ Used Abbreviations ++
• TSM = Temp Sense Material (wire is useable for Temp-Control)
• TSD = Temp Sense Detect (Useable Temp-Control)
• PWR = Power-Mode
• TCM = Temp-Control-Mode
• PBE = Preheat/Boost
• TPR = Temp-Protect
• TC = Temp-Control
• PH = Preheat
++ Mainscreen 1 "Mad Eye Moody" (bigger chars but fewer information) - Icon: Mad-Eye-Moodys Eye and Mainscreen 2 "Hawkeye Pierce" (smaller chars but more information) - Icon: Hawks-Head: ++
• Upper side: Voltage-Value
>>clicking opens Screen "USB", if connected - otherwise opens screen "Pack"<<
• Upper side: Pack-Level as graphic bar display
>>clicking opens Screen "USB", if connected - otherwise opens screen "Pack"<<
--Selecting what to show: By clicking the button "Bar" or "Digital" in the screen "Display" - Selected status will be showed--
Voltage-state is displayed in different colors - depending on the battery level (green> = 66%, yellow> = 33% and <66%, red <33%).
Charged full and Pack-Empty-Alert when using is displayed in relevant Screens
++Only in Mainscreen 2 "Hawkeye Pierce"++:
Below Pack-Display:
• Profile and Material
>>clicking one to select a Profile or Material<<
• Date and Time
>>clicking one opens Screen "System"<<
• Big Time
>>clicking opens Screen "System"<<
--Selecting what to show: By de-/activating the two buttons "In Main" in the screen "System" - Left button = switching Profile and Material (red) or time display (green), right button = if time display is activated switching between date and time (Blue1) or big time (Blue2)--
**If firing, a flame symbol appears instead at this place**
++Only in Mainscreen 2 "Hawkeye Pierce"++:
Above the lower information line:
• Left display: "Volt/Watt" - Coil voltage/coil power
• Right display: "Ampere/Ohm" - Coil current/Coil Resistant
• Lower display: "Puff/Puffs" - duration of the current Puff / total number of Puffs since reset
--The contents for output values for the lower three fields can be choosen in Screen "Display" - the choosen status will be displayed--
++ Only in Mainscreen 1 "Mad Eye Moody" ++:
While firing, a flame symbol appears instead of the lower six Symbols at this place
++ Mainscreen 1 "Mad Eye Moody" and Mainscreen 2 "Hawkeye Pierce" ++
Icon below right - Lockscreen (Icon "Bed") or "Mad Eye Moodys Eye" or "Hawks-Head"
Function:
• Icon: "Mad Eye Moodys Eye" or "Hawks-Head"
Switches in all Screens expect in the Lockscreen and active Mainscreen to the active Mainscreen
**Due to the limitation of the software, the Mainscreen 1 "Mad Eye Moody" will always be displayed after unlocking the device, even if Mainscreen 2 "Hawkeye Pierce" is activated as Mainscreen.
In these case, the Mainscreen 2 "Hawkeye Pierce" can be accessed again by simply clicking the Icon "Hawks-Head" in the lower right Edge in Mainscreen 1.**
-- Temporary or static specify which screen is defined as Mainscreen by de-/activating the buttons for "Mainscreen" in the screen "Menu 1"--
• Icon "Bed"
Switches in active Mainscreen into the Lockscreen
----------------------------------------------------------------------
Symbols (Mainscreen 1 "Mad Eye Moody" and Mainscreen 2 "Hawkeye Pierce")
----------------------------------------------------------------------
"Thermometer" with three modes
• In Power-Mode Picture (Thermometer)
- Thermometer greyed out
>> Clicking opens the "Coil" screen <<
• In TC-Mode – regular Switch (colored Thermometer) Temp-Protect On(Temp-Mode) / Off(Power-Mode)
(Note: Switching this function takes approx. 5 seconds until the change is accepted and displayed by the DNA - this is normal)
- Colored Thermometer
Temp-Protect is switched on and works
>> Clicking turns Temp-Protect off <<
- Crossed out thermometer
Temp-Protect is switched off
>> Clicking turns Temp-Protect on <<
• In TC-Mode - Special: Picture (Sign)
- Crossed out "D"
Coil without Temp Sensing Detect (coil with contact problem - fluctuating coil resistance)
>> Clicking opens the "Coil" screen <<
- Crossed out "M"
Coil without Temp Sensing Material (wrong coil wire for selected temp control profile)
>> Clicking opens the "Coil" screen <<
"Flash/Lightning Bolt" with two modes
• In Power-Mode (or in TC-Mode with deactivated Temp-Control)
Switch (Green or Blue flash) is displayed to switch Boost on and off
- Green flash
Boost is deactivated
Display in green color - Top: Coil-Power - Bottom: Label "Power"
- Blue flash
Boost is activated
Display in blue color - Top: Coil-Power - Bottom: Boost-Level
>> Switch Boost On/Off by clicking the flash symbol <<
• In TC-Mode
Switch (red or yellow flash) is displayed for switching displaying and setting either Coil-Temp/Coil-Power or Preheat-Temp/Preheat-Power in both Mainscreens
- Red flash: Display in red color - Top: Coil Temperature - Bottom: Coil-Power
- Yellow flash: Display in yellow color - Top: Preheat Temp - Bottom: Preheat-Power
>> Switch Preheat-Display-Values by clicking the flash symbol <<
If Temp-Protect is deactivated in TC-Mode: Display in orange color - Top: Coil-Power - Bottom: Boost-Level.
If Display in white color, then something with the coil doessn't match (check other infos on Mainscreen then)
"Flame / Snowflake" with two modes
• In Power Mode Picture (Flame)
- Gray Flame
Power Mode is activated
>> Clicking opens the "Profile" screen <<
• In TC Mode Switch (Flame / Snowflake)
Is displayed for switching Preheat On/Off
>> Switch Preheat On/Off by clicking the flash symbol <<
- Colored Flame
Preheat is activated
- Snowflake
Preheat is deactivated
>> Clicking toggles Preheat On/Off <<
"Coil" with two modes
• In Power Mode Picture (Coil)
- Grayed-Out Coil with both pins down
>> Clicking opens the "Profile" screen <<
• In TC-Mode Picture (Coil)
- Green Coil with both pins down
Temp-Sense-Material and Temp-Sense-Detect recognized (fully functioning TC-Mode, TC wire with activated Temp-Control)
>> Clicking opens the "Profile" screen <<
- Red Coil with left pin up
No Temp-Sense-Material, but Temp-Sense-Detect detected (usually should never actually happen - but what is usual 🙂 )
>> Clicking opens the "Profile" screen <<
- Red Coil with right pin up
Temp-Sense-Material, but no Temp-Sense-Detect detected (Coil with contact problem - fluctuating coil resistance)
>> Clicking opens the "Profile" screen <<
- Red Coil with both pins up
Neither Temp-Sense-Material nor Temp-Sense-Detect detected (no resistance wire selected for TC-Mode)
>> Clicking opens the "Profile" screen <<
Replay:
Bottom Center: "Replay"-Buttons (like on a Cassette-Recorder).
• Stop-Symbol (red filled square)
Replay is deactivated
• Pause-Symbol (two red vertical bars):
Replay is on but not initialized yet (no puff recorded) - i.e after each unlock from lockscreen
• Record-Symbol (a filled red circle):
Replay has recorded a puff and is ready for playing
• Play-Symbol (a filled red triangle):
Replay is playing
When Replay is Playing, the words "Replay" and "active" are displayed in big yellow chars in both Mainscreens. Additional a graphic bar display for control Replay warmth is shown.
Using the Replay-Mode:
The Replay-Mode is changeable seperately for each Profile.
It can be activated directly in this theme, if choosing in the "Replay"-Page ("Menu 1" - "Replay").
Also the activation of the Replay-Mode can be done in the Profile-Settings in the EScribe-Program and uploading the changed Profile-Settings onto your device.
If the Replay-Mode is activated, the standard grey Replay-Symbol on both Main-Pages of this theme is changing into a "Pause"-Symbol (two red standing bars - similar the "Pause"-Button on a tape-machine).
Recording a puff for Replay:
If the Replay-Mode is activated, you have to puff some times for initializing the Replay-Mode.
As soon the Replay-Mode is prepared for recording a puff, the "Pause"-Symbol on Mainscreen changes into a red filled circle (like the "Record"-Button on a tape-machine).
Now you can click the "Record"-Symbol after you had a puff that fully meets your expectations.
Play a recorded puff in Replay (always repeated):
As soon, as a puff is recorded, the Pause-Symbol changes into a red Triangle "Play"-Symbol (also like the "Play"-Button on a Tape-Machine).
Additionally the words "Replay" "active" are displayed in big yellow chars on both Main-Screens of the Theme.
That shows, the previous recorded puff will be repeated endless now.
Stop Replay-Mode:
For ending the Replay-loop, just click onto the red "Play"-Symbol.
The yellow "Replay"-Name dissappears from the Main-Screens and the Replay-Symbol changes back into the red filled Circle "Record"-Symbol.
The Device went back into normal using-mode now.
By clicking the "Record"-Symbol again, the last puff will be saved and the Replay-Mode changes into the Play-Mode.
All other elements should be self-explanatory.
----------------------------------------------------------------------
REPLAY
----------------------------------------------------------------------
BE AWARE!
Never enable the "Puff saved, playing" checkbox in the profile settings of your EScribe program.
Check this setting if Replay does not work as expected.
If activating the checkboxes "Puff saved, playing" at this point, the Replay mode would be activated - but without a recorded favourite puff, which could cause malfunctions.
So just activate the checkbox "Use replay on this profile".
---------------------------------------------------------------------
Developer Informations
----------------------------------------------------------------------
Used Toggles:
Toggle 1: Voltage / Power - Display in Main 2 (Choseable in Screen "Display")
Toggle 2: Current / Ohms - Display in Main 2 (Choseable in Screen "Display"
Toggle 3: Puff / Puffs - Display in Main 2 (Choseable in Screen "Display")
Toggle 4: Pack Digital / Bar - Display in Main 1 and 2 (Choseable in Screen "Display")
Toggle 5: Mainscreen 1 or 2 - As temporary or static state - (Choseable in Screen "Menu1")
Toggle 6: Coil / Preheat - shows either Coil-Temp and Coil-Power or Preheat-Temp and Preheat-Power - Displayed in Mainscreen "Mad Eye Moody" and "Hawkeye Pierce" (Choseable in Mainscreen "Mad Eye Moody" and "Hawkeye Pierce", if Temp-Control is active) by switching "Flash"-Icon
Toggle 7: Time Yes/No - Display in Main 2 (Choseable in Screen "System")
Toggle 8: Time / Time and Date - Display in Main 2 (Choseable in Screen "System")
---------------------------------------------------------------------
Whats new in this version
----------------------------------------------------------------------
3.1.6 Display-Error in Wattage-Mode repaired - Pack-Empty wasn't displayed correctly
----------------------------------------------------------------------
German Translation
----------------------------------------------------------------------
Hier die Nachfolge-Version meines Themes "Mr. Theo Bottomfeeder LED" - verfügbar in deutscher und englischer GUI-Sprache. Etwas moderner, weniger Screens und dadurch übersichtlicher. Aber dennoch sind alle notwendigen Funktionen von "Mr. Theo Bottomfeeder Black" enthalten.
Die angezeigten "AM", "PM"-Uhrzeit-Fehler in der obigen Vorschau existieren im realen Theme nicht. Diese Falsch-Anzeigen kommen von der Forum-Software
Deutsche Beschreibung (English Description see upper text)
----------------------------------------------------------------------
Unterstützt: 2 auswählbare Mainscreens - Replay - Powerbank - bis zu 4 Akkus
----------------------------------------------------------------------
- Englische und deutsche GUI-Sprachen verfügbar - - jede Sprache in zwei Versionen: Version A mit Tierkreis-Lockscreen und schgwarzen Hintergründen, Version B mit "gebrochene-Wand"-Lockscreen und floralen Screen-Hintergründen (siehe Bilder unten)
Diese Theme-Version wurde erstellt von:
Autor: Hubert Allgäuer (Alias "Mr. Bottomfeeder"), Bodensee, Deutschland
mit dem Programm:
"EScribe Suite V 2.0 mit Service Pack 15.1"
Hier die komplett überarbeitete V2 meines Themes für die DNA 75C/DNA250C (getestet mit Therion BF 75C, Rebel BF 75C, VT200, Boxer BF DNA250C, Lost Vape Drone BF 250C) in englischer und deutscher Sprache.
Es ist mein bislang komfortabelstes, informativstes und umfassendstes Theme.
Entwickelt für alle, die über sämtliche Parameter der DNA Bescheid wissen wollen.
Keine verspielten Bildchen, nur Informationen und sämtliche Parameter des DNA-Chips abrufbar und angezeigt. Aber diese dafür in einzigartiger Weise leicht verständlich und intuitiv bedienbar arrangiert.
Der Benutzer kann zwischen zwei Mainscreens auswählen:
Mainscreen 1 "Mad Eye Moody" (grössere Zeichen aber weniger Informationen) und Mainscreen 2 "Hawkeye Pierce" (kleinere Zeichen aber mehr Informationen)
In diesem Theme wird erstmals der exakte Status des Coils bestimmt und bei Problemen, welche die TempControl verhindern, automatisch auf den Power-Modus umgeschaltet und der Benutzer per Symbol auf dem Mainscreen über das Problem informiert.
Dieses Theme ist in dunkler und heller Umgebung leicht abzulesen und nicht nur gut geeignet für Entwickler und diejenigen, die die volle Kontrolle über alle Einstellungen des DNA-Chips haben wollen, sondern auch für alle normalen Benutzer.
Ich hoffe, dass alles gut funktioniert - wenn Ihr Probleme oder Fehlfunktionen feststellt oder Wünsche oder Fragen habt, können Ihr mir gerne eine Nachricht hinterlassen.
*** Über Eure Kommentare zur Brauchbarkeit dieses Themes würde mich mich sehr freuen, auch über Eure Meinung zu diesem Theme, über Verbesserungsvorschläge und Eure Wünsche für künftige Updates.
Ein Entwickler lebt schliesslich von Kommentaren und Vorschlägen 😉 ***
Viel Spaß mit diesem Theme
Beste Grüße
Mr. Bottomfeeder
P.S.
Vielen Dank an den Benutzer "Wayneo" für seine freundliche Hilfe bei der Suche nach Fehlern, seine Hinweise zur Verbesserung dieses Themes und seine Korrekturen, um die Lesbarkeit dieser Beschreibung zu verbessern! 😃😃😃
** Die unten angefügten Dateien beinhalten diese Anleitung als TXT-Datei und 30 meiner Lieblings-Lockscreens **
----------------------------------------------------------------------
Information:
----------------------------------------------------------------------
Zur Verwendung des Themes "Mr. Theo Bottomfeeder LED" und des neuen Replay-Modus benötigt Ihr folgende Firmware auf Eurem Gerät. Ansonsten kann dieses Theme nicht installiert werden.
Benötigte Firmware auf dem Gerät: "1.1 SP 33.2 INT" oder höhere Version.
----------------------------------------------------------------------
Bedienung
----------------------------------------------------------------------
++ Generell ++
Drei unterschiedliche Schalter
• "X"(rotes Kreuz-Symbol):Nicht aktiv und "Häkchen"(Grün):Aktiv
Nicht schaltbare, reine Information für den User über den Zustand eines Wertes
• Schaltfläche "Grüner Knopf" und "Roter Knopf"
Umschaltbarer Schaltfläche Ein(Grün)/Aus(Rot) um eine Option Ein-/Auszuschalten
• Schaltfläche "Blau1" und "Blau2"
Umschaltbarer Schalter, um zwischen zwei Zuständen umzuschalten
• Automatisches fallback in den Power-Mode, wenn Temp-Control Fehler
• Informations-Text in der Taskbar beschreibt die Funktion jedes selektierten Elements
++ Screens ++
• Wundern Sie sich nicht - das Screen "Profil" wechselt in seiner Darstellung automatisch je nach gewähltem Modus zwischen "Temp-Profil" und "Watt-Profil" mit den jeweils passenden Eingabe- und Auswahlmöglichkeiten.
• In allen Screens werden jeweils nur die Elemente und Einstellmöglichkeiten angezeigt, die mit den aktuellen Einstellungen möglich sind.
• Ein kleines "Schloss"-Symbol neben der Ohm-Anzeige erlaubt das Ein-/Ausschalten des Ohm-Locks direkt in den Mainscreens.
++ Benutzte Abkürzungen ++
• TSM = Temp Sense Material (Temperatur-Überwachungs geeigneter Draht)
• TSD = Temp Sense Detect (Funktionierende Temperatur Überwachung)
• PWR = Power-Mode (Watt-Modus)
• TCM = Temperatur-Überwachungs-Modus
• PBE = Preheat/Boost
• TPR = Temp-Protect
• TC = Temperatur-Kontrolle
• VH = Vorheizen
++ Mainscreen 1 "Mad Eye Moody" (grössere Zeichen, aber weniger Informationen) - Symbol: Mad-Eye-Moodys Auge und Mainscreen 2 "Hawkeye Pierce" (kleinere Zeichen, aber mehr Informationen) - Symbol: Falkenkopf: ++
• Oben: Akku-Spannung
>>Klick öffnet Screen "USB", wenn verbunden - andernfalls wird Screen "Akku" geöffnet<<
• Oben: Graphische Balken-Anzeige für Akku-Level
>>Klick öffnet Screen "USB", wenn verbunden - andernfalls wird Screen "Akku" geöffnet<<
--Auswählen was angezeigt werden soll: Durch Anklicken der Schaltfläche "Balken" oder "Digital" im Screen "Anzeige" - Der ausgewählte Status wird jeweils angezeigt --
Der Akkuzustand wird in verschiedenen Farben angezeigt - abhängig vom Akku-Level (Grün >= 66%, Gelb >= 33% und <66%, Rot < 33%)
Der Akku-Voll- und Akku-Leer-Alarm wird bei der Verwendung in den entsprechenden Screens angezeigt
++ Nur in Mainscreen 2 "Hawkeye Pierce"++:
Unterhalb der Akku-Anzeige:
• Profil und Material
>> Anklicken zur Auswahl eines Profils oder Material <<
• Datum und Uhrzeit
>> Anklicken öffnet Screen "System" <<
• Grosse Uhrzeit
>> Anklicken öffnet Screen "System" <<
--Auswählen was angezeigt werden soll: durch De-/Aktivieren der zwei Schaltflächen "In Main" im Screen "System" - Linker Button = Umschalten Profil und Material (rot) oder Zeitanzeige (grün), rechter Button = Bei aktivierter Zeitanzeige Umschalten Datum und Zeit (Blau1) oder grosse Uhrzeit (Blau2)--
**Wenn gefeuert wird erscheint stattdessen ein Flammensymbol**
++ Nur in Mainscreen 2 "Hawkeye Pierce"++:
Über der unteren Informations-Zeile:
• Linke Anzeige: "Volt/Watt" - Coil-Spannung/Coil-Leistung
• Rechte Anzeige: "Ampere/Ohm" - Coil-Strom/Coil-Widerstend
• Untere Anzeige: "Zug/Züge" - Dauer des aktuellen Zugs/Gesamtanzahl der Züge seit Reset
--Die Inhalte der Ausgabewerte für die unteren drei Felder können im Screen "Anzeige" ausgewählt werden - der jeweilige Status wird angezeigt--
++ nur in Mainscreen 1 ("Mad Eye Moody")++:
Während gefeuert wird erscheint statt der sechs unteren Symbolen ein Flammensymbol
++Mainscreen 1 "Mad Eye Moody" und Mainscreen 2 "Hawkeye Pierce"++
Symbol unten rechts - Lockscreen (Symbol "Bett") oder "Mad Eye Moodys-Auge") oder "Falkenkopf"
Funktion:
• Symbol: "Mad Eye Moodys Auge" oder "Falkenkopf".
Schaltet in allen Screens (ausser Lockscreen und Mainscreens) zu dem aktiven Mainscreen.
**Bedingt durch die Limitation der Software wird nach dem Unlock des Gerätes immer das Mainscreen 1 angezeigt, auch wenn Mainscreen 2 ("Hawkeye Pierce") als Mainscreen aktiviert ist. In diesem Fall kann das Mainscreen 2 ("Hawkeye Pierce") durch einfaches Anklicken des unteren rechten Symbols "Falkenkopf" im Mainscreen 1 wieder aufgerufen werden.**
-- Temporäres oder statisches festlegen, welche Screen als Mainscreen definiert wird, durch De-/Aktivieren der Schaltflächen für "Mainscreen" im Screen "Menu 1" --
• Symbol "Bett"
Schaltet im aktiven Mainscreen in das Lockscreen
----------------------------------------------------------------------
Symbole (Mainscreen 1 "Mad Eye Moody" und Mainscreen 2 "Hawkeye Pierce"):
----------------------------------------------------------------------
"Thermometer" mit drei Modi
• Im Power-Modus Bild (Thermometer)
- Thermometer ausgegraut, wenn Power-Modus eingestellt ist
>>Anklicken öffnet Screen "Coil"<<
• Im TC-Modus – Normal Schalter (Thermometer) Temp-Protect Ein(Temperatur-Modus) / Aus(Power-Modus)
(Anmerkung: Das Umschalten dieser Funktion dauert ca. 5 Sek., bis die Änderung vom DNA übernommen und angezeigt wird - dies ist normal)
- Farbiger Thermometer
Temp-Protect eingeschaltet ist und funktioniert
>>Anklicken schaltet Temp-Protect aus<<
- Durchgestrichenes Thermometer
Temp-Protect wurde ausgeschaltet
>>Anklicken schaltet Temp-Protect an<<
• Im TC-Modus – Spezial Bild (Buchstabe)
- Durchgestrichenes "D"
Coil ohne Temp Sensing Detect erkannt wurde (Verdampfer mit Kontakt-Problem - schwankender Coil-Widerstand)
>>Anklicken öffnet Screen "Coil"<<
- Durchgestrichenes "M
Coil ohne Temp Sensing Material (falscher Coildraht für gewähltes Temp-Control-Profil)
>>Anklicken öffnet Screen "Coil"<<
"Blitz" mit zwei Modi
• Im Power(Watt)-Modus (oder im TC-Mode mit deaktiviertem Temp-Control)
Schalter (Grüner oder Blauer Blitz) wird angezeigt, um Boost (nur im Power-Modus) ein- und auszuschalten
- Grüner Blitz wird angezeigt (Boost Aus)
Grüne Anzeige - Oben: Coil-Power, Unten: Label "Power"
- Blauer Blitz wird angezeigt (Boost Ein)
Blaue Anzeige - Oben: Coil-Power, Unten: Boost-Level
>>Umschalten Boost Ein/Aus durch Anklicken des Blitz-Symbols<<
• Im TC-Modus
Schalter (Roter oder Gelber Blitz) wird angezeigt, um die Haupt-Anzeige in beiden Mainscreens auszuwählen
- Roter Blitz: Rote Anzeige
Oben: Coil-Temperatur - Unten: Coil-Power
- Gelber Blitz: Gelbe Anzeige
Oben: Vorheizen-Temperatur - Unten: Vorheizen-Power
>>Umschalten der Anzeige-Werte durch Anklicken des Blitz-Symbols<<
Wenn im TC-Modus die Temp-Protect deaktiviert ist, wird in oranger Farbe Oben: Coil-Power und Unten: Boost-Level angezeigt.
Werden die Werte auf dem Display in weisser Schrift angezeigt, dann stimmt etwas mit dem Coil nicht (vgl. die anderen Informationen auf dem Mainscreen)
"Flamme/Schneeflocke" mit zwei Modi
• Im Power-Modus Bild (Flamme)
- Graue Flamme, wenn Power-Modus aktiviert ist
>>Anklicken öffnet Screen "Profil"<<
• Im TC-Modus Schalter (Flamme/Schneeflocke)
Um Vorheizen ein und auszuschalten
- Farbige Flamme, wenn im TC-Modus Vorheizen aktiviert ist
- Schneeflocke, wenn im TC-Modus Vorheizen deaktiviert ist
>> Anklicken schaltet Vorheizen Ein/Aus) <<
"Wicklung" mit zwei Modi
• Im Power-Modus Bild (Wicklung)
- Ausgegraute Wicklung mit beiden Pins nach unten
>>Anklicken öffnet Screen "Profil"<<
• Im TC-Modus Bild (Wicklung)
- Grüne Wicklung mit beiden Pins nach unten: Temp-Sense-Material und Temp-Sense-Detect erkannt (voll funktionierender TC-Modus, TC-Draht mit aktivierter Temp-Control)
>>Anklicken öffnet Screen "Profil"<<
- Rote Wicklung mit linkem Pin nach oben: Kein Temp-Sense-Material, aber Temp-Sense-Detect erkannt (Sollte eigentlich nie vorkommen)
>>Anklicken öffnet Screen "Profil"<<
- Rote Wicklung mit rechtem Pin nach oben: Temp-Sense-Material, aber kein Temp-Sense-Detect erkannt (Verdampfer mit Kontaktproblem - schwankender Coil-Widerstand)
>>Anklicken öffnet Screen "Profil"<<
- Rote Wicklung mit beiden Pins nach oben: Weder Temp-Sense-Material noch Temp-Sense-Detect erkannt (Falscher Draht für Temp-Control ausgewählt)
>>Anklicken öffnet Screen "Profil"<<
Replay:
Unten Mitte: "Replay" -Buttons (wie bei einem Kassetten-Recorder).
• Stop-Symbol (rotes gefülltes Quadrat)
Replay ist deaktiviert
• Pause-Symbol (zwei rote vertikale Balken)
Replay ist aktiviert aber noch nicht initialisiert (Kein aufgezeichneter Zug) - z.B. nach jedem Aufwecken aus dem Lockscreen
• Record-Symbol (ein gefüllter roter Kreis)
Replay hat einen Zug aufgezeichnet und ist bereit zum Abspielen
• Play-Symbol (ein gefülltes rotes Dreieck)
Replay wird abgespielt
Während der Wiedergabe werden die Wörter "Replay" und "aktiviert" in großen gelben Zeichen auf beiden Mainscreens angezeigt. Zusätzlich wird eine Balken-Anzeige für die Einstellung der Replay-Wärme eingeblendet.
Replay-Modus benutzen:
Der Replay-Modus ist für jedes Profil einzeln änderbar.
Es kann direkt in diesem Theme aktiviert werden, wenn diese Funktion in der "Replay"-Screen ("Menu 1" - "Replay") aktiviert wird.
Auch kann die Aktivierung des Replay-Modus in den Profil-Einstellungen im EScribe-Programm erfolgen und dann die geänderten Profil-Einstellungen auf das Gerät hochgeladen werden.
Wenn der Replay-Modus aktiviert ist, wechselt das graue Standard-Replay-Symbol auf beiden Main-Pages dieses Themes in ein "Stop" -Symbol (zwei rote stehende Balken - ähnlich dem "Pause" -Button auf einem Cassetten-Recorder) .
Aufnahme eines Zugs für Replay:
Wenn der Replay-Modus aktiviert ist, müssen Sie einige Male dampfen, um den Replay-Modus zu initialisieren.
Sobald der Replay-Modus für die Aufnahme eines Zugs vorbereitet ist, wechselt das "Pause"-Symbol auf dem Mainscreen in einen roten gefüllten Kreis (wie der "Aufnahme" -Button auf einem Cassetten-Recorder).
Jetzt können Sie das "Aufnahme" -Symbol Anklicken, nachdem Sie einen Zug hatten, der Ihre Erwartungen voll erfüllt.
Wiederholen eines aufgezeichneten Zugs in Replay (wird immer wiederholt):
Sobald ein Zug aufgezeichnet wird, verwandelt sich das Replay-Symbol in ein rotes Dreieck "Play" -Symbol (auch wie der "Play" -Button auf einem Cassetten-Recorder).
Zusätzlich werden die Worte "Replay" und "aktiviert" in großen gelben Zeichen auf beiden Mainscreens des Themes angezeigt.
Das zeigt an, dass der vorher aufgezeichnete Zug nun endlos wiederholt wird.
Beenden/Unterbrechen des Replay-Modus:
Um den Replay-Loop zu beenden, klicken Sie einfach erneut auf das rote "Play" -Symbol.
Der gelbe "Replay"-Name verschwindet von den Mainscreens und das Replay-Symbol wechselt zurück in den rot gefüllten Kreis "Aufnahme"-Symbol.
Das Gerät ist jetzt wieder in den normalen Benutzungsmodus zurückgekehrt.
Durch erneutes Anklicken des "Aufnahme"-Symbols wird der letzte Zug gespeichert und der Replay-Modus wechselt in den Play-Modus.
Alle anderen Elemente sollten selbsterklärend sein.
----------------------------------------------------------------------
REPLAY
----------------------------------------------------------------------
VORSICHT!
Aktivieren Sie in den Profil-Einstellungen Ihres EScribe-Programms nie die Checkbox "Puff saved, playing".
Kontrollieren Sie diese Einstellung, wenn Replay nicht wie erwartet funktioniert.
Wenn Sie an dieser Stelle die Checkboxen "Puff saved, playing" aktivieren, wird der Replay-Modus aktiviert - allerdings ohne einen aufgezeichneten Lieblings-Puff, was zu Fehlfunktionen führen kann.
Aktivieren Sie also einfach nur die Kontrollkästchen "Use replay on this profile".
----------------------------------------------------------------------
Entwickler Informationen
----------------------------------------------------------------------
Verwendete Toggles:
Toggle 1: Volt / Watt - Anzeige in Main 2 (Auswählbar in Screen "Anzeige")
Toggle 2: Ampere / Ohm - Anzeige in Main 2 (Auswählbar in Screen "Anzeige")
Toggle 3: Zug / Züge - Anzeige in Main 2 (Auswählbar in Screen "Anzeige")
Toggle 4: Akku Digital / Balken - Anzeige in Main 1 und 2 (Auswählbar in Screen "Anzeige")
Toggle 5: Mainscreen 1 oder 2 - temporär oder statisch - (Auswählbar in Screen "Menu1")
Toggle 6: Coil / Vorheiz-Werte - entweder Coil-Temperatur und Coil-Power oder Vorheiz-Temperatur und Vorheiz-Power - Anzeige in den Mainscreens "Mad Eye Moody" und "Hawkeye Pierce" (Auswählbar im TC-Modus in beiden Mainscreens durch Umschalten des Blitz-Symbols)
Toggle 7: Uhr ja/nein - Anzeige in Main 2 (Auswählbar in Screen "System")
Toggle 8: Zeit / Zeit und Datum - Anzeige in Main 2 (Auswählbar in Screen "System")
----------------------------------------------------------------------
Neu in dieser Version
----------------------------------------------------------------------
3.1.6 Anzeigefehler im Watt-Mode behoben - Akku-Leer-Anzeige wurde nicht korrekt angezeigt.
----------------------------------------------------------------------
Attachments/Anlagen
----------------------------------------------------------------------
Lockscreen-Pictures.zip
Mr. Theo Bottomfeeder LED V2 Manual English German.txt
Mr. Theo Bottomfeeder LED V2 Manual English German.doc
1,243 downloads
- up to 4 batteries
- powerbank
- (and 1 more)
-
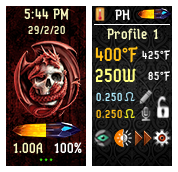
replay Gothic DNA250C / DNA75C Replay & Power bank
By copyman
The theme is based on my previous topics. It works on DNA75C DNA250C, and in DNA75C does not operate "Power bank" mode.
The theme of VapingBad is the basis theme - here are many changed: icons and there are extra features .. I use his conversion for pre-heat - a very compact solution.
Copy from VapingBad
*****************************************************************
In the photos the 1st is when preheat is on, 2nd is preheat off, 3rd is dropped out of temp protection. 4th is TP-enabled=false, 5th is TS-Material=false.
This is how the conditions are set:
The TP icon:
default shows on image,
atty\temp-protect-enabled=false as the condition for showing the off image.
atty\temp-sensing-material=false also for showing the off image.
Text status:
default shows "PH" for preheat
atty\preheat-enabled=false shows "---"
atty\temp-protect-enabled=false shows "PWR" in yellow
atty\temp-sensing-material=false shows "PWR"in yellow
atty\temp-sensing-dectect=false shows "???" in orange (tested with an ss coil using a NI profile)
Temp Field:
atty\temp as default
atty\temp-protect-enabled=false shows diag\atty\voltage
atty\temp-sensing-material=false shows diag\atty\voltage
*****************************************************************
Extras:
In Lock Screen down: Current in charge or root temperature in non charging mode.
In Main Screen two resistans: locked ohms and life ohms.
In Main Screen right to Power: temperature of board or output voltage in VW mode.
In Main Screen right to Temperature: Temperature ot last puff
Screenshot for Simple version:
Screenshot for extended version:
Copyman-Gothic-III.ecigtheme
Copyman-Gothic-IV.ecigtheme
Copyman-Gothic-IV-simple.ecigtheme
4,977 downloads
-
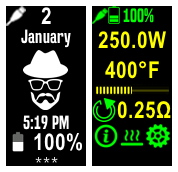
multicolor Khaled Shehab Theme DNA75C, DNA100C & DNA250C
This is the latest version of the theme that I have modified based on Lost Vape Therion DNlA 75c mods. Fewer screens, so navigation is easy, but you will find all the required features in it. The most important characteristic of this theme is the large size of fonts, which makes it easier to deal with the device.
There are many versions to sui all tastes.
I hope you like it
Choose one or more of the following versions:
Last version is V 3.0.0
You can change the text color between (White) and (Green/Yellow) by going to settings and then color toggle
Version 3.1.0
Some improvement and You can change the text color between (White) and (Green/Yellow) by going to settings and then color toggle
Download Version 3.1.0
Version 3.0.0
You can change the text color between White and Green/Yellow by going to settings and then color toggle
Download V 3.0.0
Version 1.2.4
Download Color 01 DNA75C-DNA250C V1.2.4
Download Color 02 DNA75C-DNA250C V1.2.4
Download Color 03 DNA75C-DNA250C V1.2.4
Download Color 04 DNA75C-DNA250C V1.2.4
Download Color 05 DNA75C-DNA250C V1.2.4
Download Color 06 DNA75C-DNA250C V1.2.4
Download Color 07 DNA75C-DNA250C V1.2.4
Download Color 08 DNA75C-DNA250C V1.2.4
Download Color 09 DNA75C-DNA250C V1.2.4
Download Color 10 DNA75C-DNA250C V1.2.4
Version 2.0.0
Several improvements, redesign of some pages and new icons
Download Color 01 DNA75C-DNA250C V2.0.0
Download Color 02 DNA75C-DNA250C V2.0.0
Download Color 03 DNA75C-DNA250C V2.0.0
Download Color 04 DNA75C-DNA250C V2.0.0
Download Color 05 DNA75C-DNA250C V2.0.0
Download Color 06 DNA75C-DNA250C V2.0.0
Download Color 07 DNA75C-DNA250C V2.0.0
Download Color 08 DNA75C-DNA250C V2.0.0
Download Color 09 DNA75C-DNA250C V2.0.0
Download Color 10 DNA75C-DNA250C V2.0.0
Version 2.1.0
Several improvements
Download Color 01 DNA75C-DNA250C V2.1.0
Download Color 02 DNA75C-DNA250C V2.1.0
Download Color 03 DNA75C-DNA250C V2.1.0
Download Color 04 DNA75C-DNA250C V2.1.0
Download Color 05 DNA75C-DNA250C V2.1.0
Version 2.1.3
Larger font size and some improvements
Download Color 01 DNA75C-DNA250C V2.1.3
Download Color 02 DNA75C-DNA250C V2.1.3
Download Color 03 DNA75C-DNA250C V2.1.3
Download Color 04 DNA75C-DNA250C V2.1.3
Download Color 05 DNA75C-DNA250C C2.1.3
Download Color 06 DNA75C-DNA250C C2.1.3
1,031 downloads
-
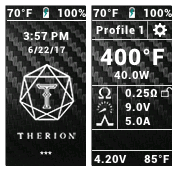
-
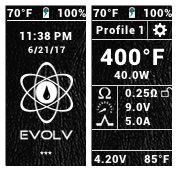
JoeCockBill's Evolv theme
By JoeCockBill
Evolv version of my Therion theme, for other DNA75C devices.
carbon:
blue:
leather:
red (or orange/purple/pink/whatever):
white:
.
7,285 downloads
-
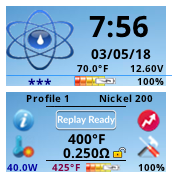


_dna250c_ecigtheme.a7548928fb665d0fbe6282876e0082b8.png)


LIGHTRAYS_ecigtheme.991b1431793e26d3f4e1ddc07070976f.png)


_ecigtheme.a048502650b7a90b9e7176d86ede3e5c.png)


![More information about "NEO Cloudz [on Crack™] {DNA250C + DNA75C}"](http://forum.evolvapor.com/applications/core/interface/file/index.php?file=/monthly_2021_06/preview.main.e323f06baa19d391.NP20_ecigtheme.cc5c31d0a4bb770ce3beeed65e31dc1e.png)
_EN_dna250c_ecigtheme.6bc8b1b21c3fa16d97f69cd0aa9db393.png)


