

Wayneo
-
Posts
2,810 -
Joined
-
Days Won
516
Content Type
Profiles
Forums
Downloads
Everything posted by Wayneo
-
Your cell 2, if you look is only at 3.4v which is much lower than cell 1. You should externally charge both. When done charging they should both be above 4.1V
-
Start escribe with mod plugged in. Click on 'Device Monitor'. You don't need to take a puff or anything. Here is an example of what's requested, this is done with Windows Snipping Tool but any screen grab will do.

-

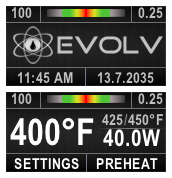 This theme is just what the doctor ordered for my old tired eyes. BIG numbers I can read without my glasses. 👍👍 All the features you need, not all the features there are. Replay works as expected. TC works as expected. Descriptive warnings. (Disclaimer: I have been testing this theme before it was released)
- 2 comments
-
- 2
-

-

-
- dovpo
- steamcrave
- (and 3 more)
-
Seeing as how you mentioned about bending the screen cable, it's been done for years. Here's a tutorial by an Evolv employee. Look at the pictures. Read point 6. https://forum.evolvapor.com/topic/71341-how-to-change-a-screen-on-lostvape-triade/ Dunno where you found that guy. 🤷♀️
-
lost vape dna 250c temperature cannot go higher than 180C
Wayneo replied to rin's topic in DNA 250 Color
@rin Think of each item (temperature and watts) as a maximum limit. If you want to vape at 15 watts and your temp to stay at or below 250°C that's perfectly fine. (@dwcraig1 screenshot shows that example) If you want to vape at 250°C then as your own 2nd screenshot shows, you need more than 15 watts, and that's perfectly fine also. -
- 1 review
-
- 2
-
-
China has not followed American rules/laws. They still try to innovate, but this software suite is still arguably the best from any mfgr, in terms of TC, settings, tools. In fact, it's soooo good, the Russians made a knock of it. Till Replay came along.
-
Rarely a board or mod problem. More of a user setting or theme misunderstanding/issue.
-
What does this new version fix or change @Akis?
-
I'd probably start escribe with mod connected. Then 'Tools' -> 'Diagnostics' -> 'Reboot' -> 'Hard Reboot' Then under 'Help' -> 'Backups' choose a backup to a known good time Let me know how that works
-
Can you see the entire screen, but ALL the colors are wrong, or is it like a thumbprint in the center? When did this start happening?
-
That is not a true statement.
-
You're very welcome 🙌 Enjoy your mod.
-
The only way to get boost on the 60 is if you load the intl. firmware Boost Punch (1 - 11) is a 1 second proportional extra watts before settling back to your set watts. Any material.
-
@Bendude For a few dollars more you might want to use the 250C board which is buck only, no boost like the 75C and has the passthrough capability natively. You should check out http://analogboxmods.ca/Box-Mod-Kits who has complete kits and videos of builds Xbox PSU "Vapestation" Build - https://youtu.be/RoKaZ_iHiX0 DIY 636W 4x12v Output "VapeStation" Build - https://youtu.be/0K1PaMRnhsA DNA 200/250 DIY Box Mod (Passthrough) Build - https://youtu.be/NwDIzz7SxFg
-
The Evolv help desk should be able to help you. There's a link in my signature line.
-
You'll only be swapping out portability for cables and cables. Yup, at least 2. Edit: On the 75 there's a 'this mod uses an external charger' option I don't remember being there. That disables charging via USB. But it shows the lightning bolt when connected.
-
How do I download the International theme??!?
Wayneo replied to benny283216's topic in DNA 250 Color
The latest evolv default is always available when you start escribe theme designer. That works with both versions (US and Intl) You also need the intl firmware on your mod. You can start escribe -> 'device monitor' to see the version on your mod. Edit: At the top of this page you should also see a 'downloads' option which will take you to the 'theme park' with over 1100 different themes.- 1 reply
-
- 1
-
-
A 0.03 drop is nothing to worry about at all, especially with a Kanthal coil in power mode. Surprised you could even see that on the screen, but next time if you're concerned, you can Post a screenshot like above while firing, showing that behavior 🙌
-
DNA 250c - Check Atomizer error on Replay profile
Wayneo replied to Cloud Anthem's topic in DNA 250 Color
YOU have proven your mod works in Replay, successfully with your boro. YOU have proven this same material works in TC in your BB, and here in your boro. Where does that leave you? What's left to check? EDIT: Quoted from the datasheet itself. Check Atomizer: The DNA has detected a large resistance change during operation, the atomizer has shorted out, or the atomizer resistance is incorrect for the power setting. -
DNA 250c - Check Atomizer error on Replay profile
Wayneo replied to Cloud Anthem's topic in DNA 250 Color
You've proven your wire (material) in your BB, remember. Do whatever you want, how you want, when you want. If you decide to do what I asked lemme know. 🙌 -
DNA 250c - Check Atomizer error on Replay profile
Wayneo replied to Cloud Anthem's topic in DNA 250 Color
Thank you. 👍 This leads me back to the beginning, your 'check atomizer' error, which means just that. Check there are no loose or stray wires around the deck, the coils can't touch (each other or the cap) while firing, your coil is secured well, and the bottom positive pin is secure. After you've done that, put it back on your mod and measure the ohms in your SS316 profile, before trying TC only, no replay. EDIT: I hope you have that ability in your theme, OR you can do it in escribe and as always 'upload settings to mod'. Hope that helps. Let me know. -
DNA 250c - Check Atomizer error on Replay profile
Wayneo replied to Cloud Anthem's topic in DNA 250 Color
Nope, not gonna go there. I need clear answers to clear questions. Your answer is confused. If that Yup! is in response to that one question I asked "So above 40W on your boro you get 'check atomizer'?" Then "Boro build passed with flying colors on both TC SS316 and Replay (SS316 setting)." makes no sense. Which is it? -
DNA 250c - Check Atomizer error on Replay profile
Wayneo replied to Cloud Anthem's topic in DNA 250 Color
OK. So above 40W on your boro you get 'check atomizer'? * Just gotta mention in passing I don't do that Replay TC (SS316) either, and won't help with that. Not even mentioned in my 2 tests. PS And you just couldn't wait (like I asked)


