

dwcraig1
-
Posts
2,490 -
Joined
-
Last visited
-
Days Won
177
Content Type
Profiles
Forums
Downloads
Everything posted by dwcraig1
-

New battery not charging fully
dwcraig1 replied to thelateoctober's topic in Installation and Assembly
If DNA250 it should be the two center ones. #2 positive and #1 negitive for cell #2 connection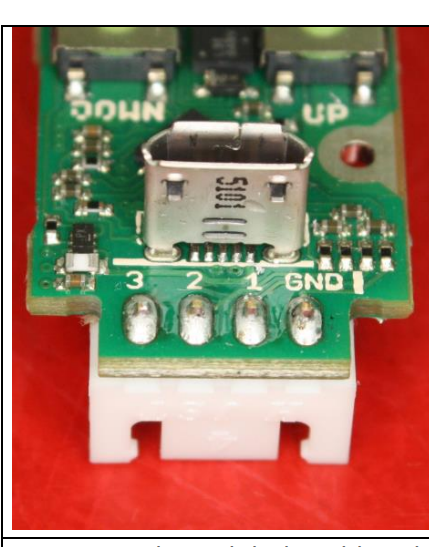
-
New battery not charging fully
dwcraig1 replied to thelateoctober's topic in Installation and Assembly
I used a small gauge solid wire, no tinning. Made little circles like elecrtic stove burners for on the ends of the 5 ml juice bottle and simply taped the wire to the side of the bottle. On the battery end I just pushed the wire into the holes on the JST plug and added some tape so they would stay put. Use your meter to find them, they will be next to each other. -
New battery not charging fully
dwcraig1 replied to thelateoctober's topic in Installation and Assembly
The battery in my post had been hooked up to a small hobby charger and an expensive one with no results. So just what is your concern with my recomended method? -
Settings for TC on DNA75c for NiFe48, SS316L, SS304L
dwcraig1 replied to Yol's topic in DNA 75 Color and 100 Color
https://www.steam-engine.org/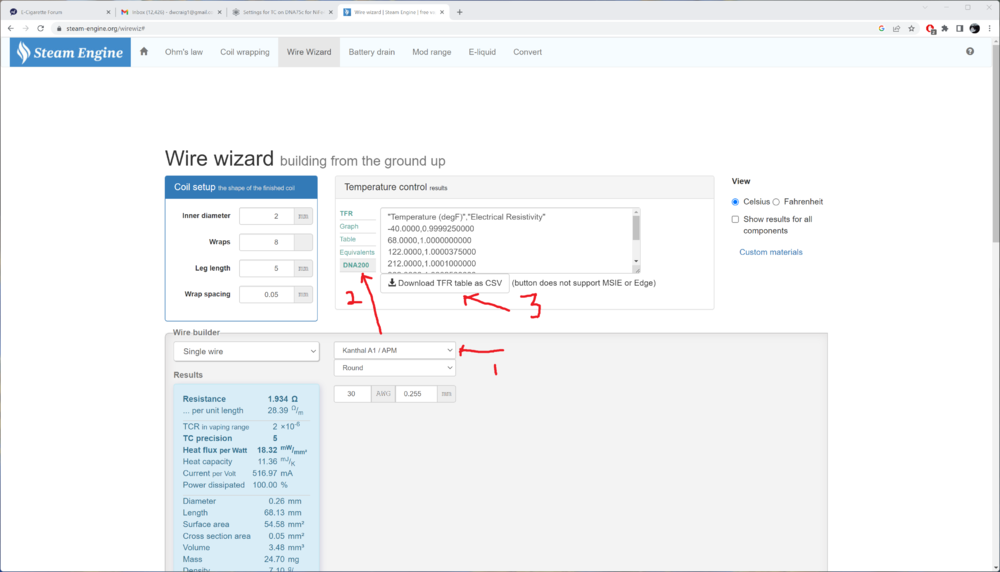
-
New battery not charging fully
dwcraig1 replied to thelateoctober's topic in Installation and Assembly
It has to reduce the cells that are full charge in order to bring up the low one, this is done with very smal resistors. -
New battery not charging fully
dwcraig1 replied to thelateoctober's topic in Installation and Assembly
There is an option under the Tools tab / Diagnostics/ USB Recovery that will prompt balance charging. -
New battery not charging fully
dwcraig1 replied to thelateoctober's topic in Installation and Assembly
That's the balance charging doing it's slow thing. If you can implement what I posted it will get it up in like an hour. Once balanced use EScribe to see that cell #2's voltage drop when firing heavy load matches up with cell #1 &3. If not then maybe defective. -
New battery not charging fully
dwcraig1 replied to thelateoctober's topic in Installation and Assembly
What were the 3 voltages when you first installed it? I should have said "was it out of balance to start with?" -
New battery not charging fully
dwcraig1 replied to thelateoctober's topic in Installation and Assembly
Probably a couple of days. EScribe will show a charging rate, low but charging non the less. -
New battery not charging fully
dwcraig1 replied to thelateoctober's topic in Installation and Assembly
In this image I used a juce bottle with wires taped to it's ends and placed in a charger. The wires run to the balance plug and connect to the low cell. While this may look a bit crude it worked very well. If you don't want to wait till it balances via mod consider this.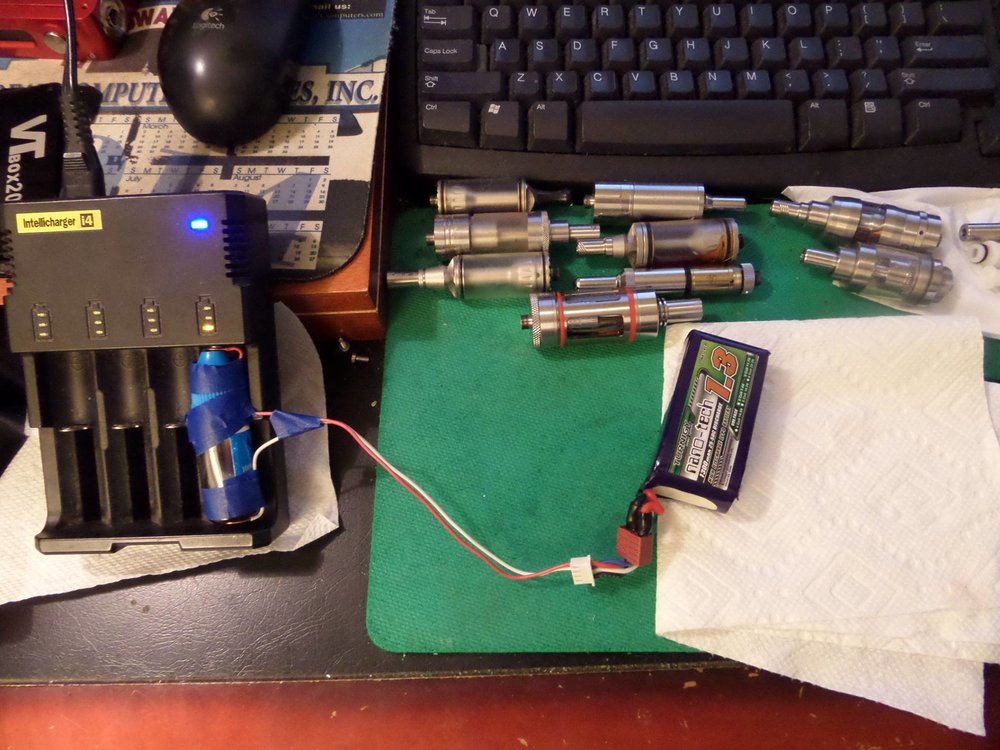
-
New battery not charging fully
dwcraig1 replied to thelateoctober's topic in Installation and Assembly
It appears to be balance charging, it's a slow process. It should get there eventually. -
I torch all wire with the exception of Ni200 prior to winding. Then glow them after installation before installing wick.
-
Are you using the same wire as in your earlier posts? The resistance of 0.12 troubles me. With building the same coil with the same wire but 6-7 wraps instead of 10-11 should be around 0.21 ohms for the pair of coils. Is there any chance they are touching the chamber? Have you checked resistance with the chamber removed, deck only?
-
Let your coils cool and use EScribe's Atomizer Analizer to check resistance.
-
316 316L are so close. So it says 0.4 ohms, is that per coil or total. My experience says per coil.
-
SS316 has a slightly higher resistance than SS430, about 20%
-
0.11 doesn't seem right
-
Are you using two strands of 28 gauge SS316 twisted like mine, or just one strand?
-
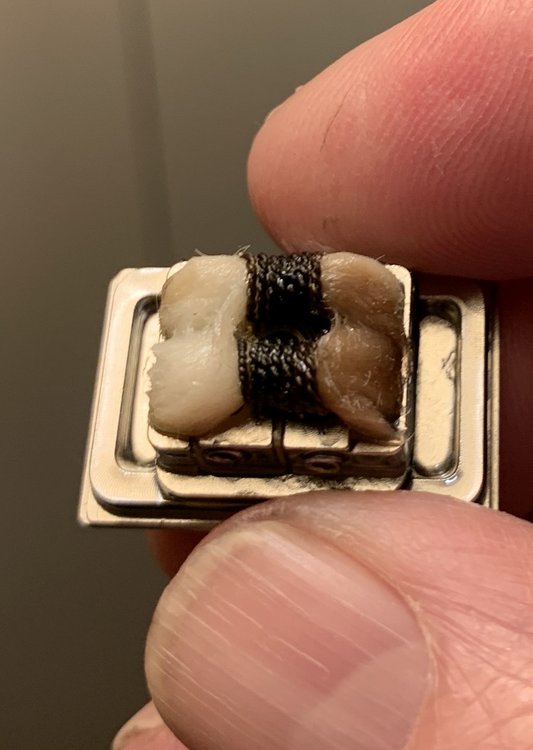
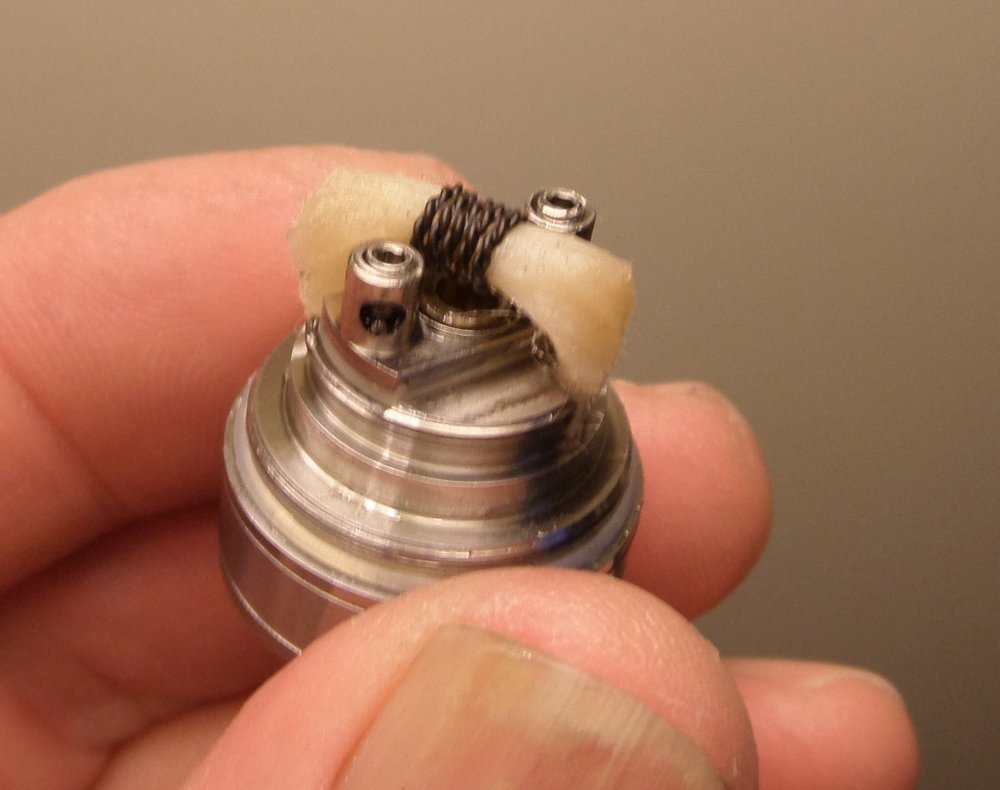
Here is my first build on my Steam Crave boro, time to re-do it. 2.5mm ID,twisted 28 gauge SS430,0.224 ohms
-
Here is one of mine from 7 years ago, I twist the wire more these days but pretty much the same as I still do today.
-
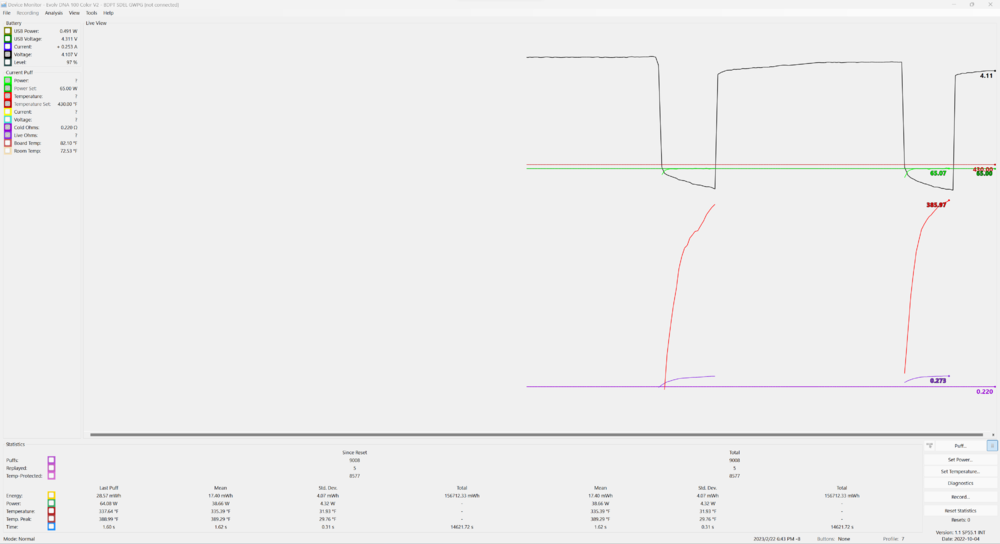
The non TC snip shows some boost and you are getting your 63 watts that it s set to. The TC snip shows it hitting temp setting and throtting down below 54. Check all your connections. Use Atomizer Analyzer to check that your atty's 510 is making contact with the mod's 510 positive pin well before it's screwed in all the way. (and not the last half turn)
-
I would guess that the holder is the problem then.
-
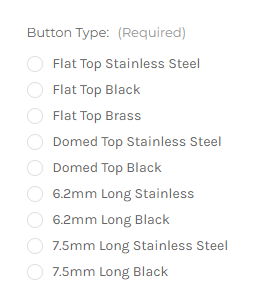
Alpintech sell two different actuator button lengths.
-
I use twisted 28 gauge SS430 almost always. Here is a snippet of my dual coil SS430 build firing at 65 watts in EScribe's Device Monitor. My coils are 2.7 mm id and 6 or 7 wraps each. It would be most helpful if you could post a snippet of yours firing with the same boxes checked as mine. DNA100C
-
battery problems Battery Indicator Problem
dwcraig1 replied to odhyea's topic in Batteries and Charging
Best to ask that here: https://helpdesk.evolvapor.com/index.php?a=add&category=1 Be sure to say that the USB cable is not plugged in. (It appears that it is not plugged in)- 1 reply
-
- 2
-

-
- battery
- battery meter
- (and 5 more)


