
-
Posts
22 -
Joined
-
Last visited
Content Type
Profiles
Forums
Downloads
Everything posted by jakeT
-

LIGHTRAYS_ecigtheme.991b1431793e26d3f4e1ddc07070976f.png) Hi all, I’m an ex-vaper now and haven’t been maintaining this theme for some time! If anybody wants to take over and update it please feel free to do so. If there’s anything you need, or if you want access to my account to post updates please let me know. You can contact me at jakejunk1@icloud.com Cheers!
Hi all, I’m an ex-vaper now and haven’t been maintaining this theme for some time! If anybody wants to take over and update it please feel free to do so. If there’s anything you need, or if you want access to my account to post updates please let me know. You can contact me at jakejunk1@icloud.com Cheers! -
I believe you have to change Max Output under the Mod tab, at least that's what worked for me!
-
 This is a great theme, it's so clean and simple. Thanks for sharing!
 -
 I am wondering this also This is how I do it.. After you have uploaded a new version wait for a minute or 2 then on your theme's page under 'File Actions' choose 'Edit Details', down the bottom there should be a section for 'Primary Screenshot'. Select which image you want and save. When you upload a new version I think the forum software parses your file and generates the screenshots which seems to take about 30-60 seconds, which is why I recommend you wait for a minute before clicking edit. I'm not sure if there is a better/easier way to do it but if there is I'd like to know also. In case you ever upload multiple versions, I have found that it only generates screenshots for the last uploaded file i.e. the file at the bottom of the list. So if you want the screenshots to be of a specific version you have to upload that version last.
 -
Any settings on the General, Display, Materials, Mod, and Research tabs won't carry over in a theme. E.g. I use 3 clicks of the up button to unlock my device, if I use your theme it is still 3 clicks of the up button because that is what I have set under the 'General' tab in Escribe. The same goes for mod internal resistance - it is set under the 'Mod' tab and therefore does not carry over in a theme. Hope that clears it up
-
Looks very nice! Just so you know, mod internal resistance and unlock sequence are Escribe settings and not contained within themes.
- 7 comments
-
- 1
-

-
- dna
- paranormal
- (and 4 more)
-
I get about a day out of mine, vaping anywhere between 45-75W using 2 VTC6s. I usually have another set of batteries charged and ready to go. It's difficult to tell if your batteries are draining too fast as everybody has a different style of vaping. As an example - if you were to vape solely at 40W on a fully charged pair of VTC6s I would expect you would get somewhere around 1,600 seconds total puff time. Divide this by the average time of your puffs to figure out roughly how many puffs you can expect out of a full charge. My puffs are always around the 3.5 second mark so 1600/3.5=457. Obviously if you up the wattage you will get less battery life and vice versa. Hope that helps!
-
Thanks! I still can't see it though. I'm using the Mac beta perhaps that is why. The closest I can get is to double click an image/gauge and it will open a finder window, but it's a seemingly irrelevant window.
-
-
How do you do this?! I’ve been trying to figure this out for days now lol
-
I use 2.75 on my Therion 75C with 2 VTC6s. I think the soft cutoff is the cutoff under load i.e. while you're firing not the resting voltage. The board itself has a hard limit of 3.0v according to the spec sheet (resting voltage not voltage under load). From what I've read 2.75 is fine for the soft cutoff using VTC6s. Using a higher soft cutoff will increase the overall lifespan of your batteries but using a lower cutoff will get you more time out of a single charge. I wouldn't go below 2.75 though. Also, you're battery gauge/battery percent may be inaccurate if the discharge curve is not designed for your model of battery. I've attached the curve I use for 2 VTC6s, you can load it in Escribe using the "Load CSV" under the discharge profile graph in the mod tab, this helps to make the battery gauge more accurate I'm not an expert and I could be wrong. Someone please correct me if so. Sony_VTC6 (2)_18650_3000 mah_19.96 Wh.csv
-
At 25W you'll get about 850 seconds total run time. Divide that by the average time of your puffs to find how many puffs you should be getting out of it. E.g. my puffs are around 3.5 seconds long, 850/3.5 = 242. If I were using it I'd expect to get somewhere around 240 puffs out of a full charge. Hope that helps! (This is assuming that the nominal voltage of the battery is 3.7v and an efficiency of 90%)
-
Escribe beta for Mac: https://forum.evolvapor.com/topic/68861-mac-escribe-beta-thread/
-
Version 1.0.0
549 downloads
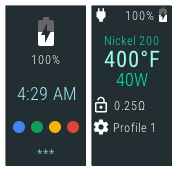
Same functionality as my other themes. Loads of colour! US version: Date format m.d.yy and spelling e.g. atomizer UK/AU version: Date format d.m.yy and spelling e.g. atomiser Features / how to use: -Large battery bar on lock screen for quick viewing. -Dynamic status bar on Lock Screen, Main Screen, Settings Menu, Lock Settings and Device Monitor Settings. -Lock Screen shows asterisks (**) as you enter your unlock sequence. -Settings Menu shows the name of the highlighted icon. (Atomiser, Display, Puff Info etc.) etc. etc... Please note that you won't actually see 'DNA' on the screen, only relevant text. -Temperature, resistance lock and preheat options will only display when a temperature sensing material is selected. i.e. in plain wattage mode the options for these will disappear. -Selecting the coil material on the Main Screen takes you directly to atomiser settings. Note that coil material is not displayed if you are in wattage mode. -Most screens feature a 'Back' or 'Exit' button or a combination of both. 'Back' will take you back to the screen you came from, e.g. if you go to Atomiser Settings from the Settings Menu the back button will take you back to the Settings Menu. If you go to Atomiser Settings by selecting the coil material on the Main Screen, the Back button will take you back to the Main Screen. In all cases the Exit button will take you directly to the Main Screen. -Black background on the Device Monitor, Diagnostic and Device Info screens to make the text easier to see and read. -You can alter 'Watts:' and 'Temp:' on the Diagnostic screen. -Screens you can fire from: Main Screen (obviously), Atomiser Settings, Device Monitor and Diagnostic. Pressing the fire button on any other screen will give the same result as selecting 'Back'. e.g. if you are on the Display Settings screen you can press the fire button twice to go back to the Main Screen- pressing once goes back to the Settings Menu and another press takes you back to the Main Screen. -Select the graph on the Device Monitor page to access the Device Monitor Settings. -Board temperature and battery voltage are displayed at the bottom of the Main Screen. -Time & Date and Lock Settings are accessible from the System Settings screen. -The 'Display' icon on the Settings Menu changes based on whether stealth mode is enabled or disabled. -The options for stealth level are 'Off', '1', '2', or '3'. 3 = Screen turns off 2 = Very dim 1 = Dim Off = Stealth mode is disabled -Indicator light: Fade in/out red = charging Green = charge complete Blue/purple = firing Enjoy! -
 This is very cool, good job
-
- 1
-
-
DIAGONAL_ecigtheme.1077de2d850ed47aacba64e62302fc2e.png)
Version 1.0.2
363 downloads
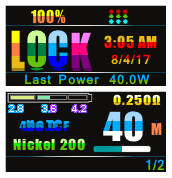
*** Same as my Therion 75C Blue theme but jazzed up with rainbows! Puuuurdy. *** US version: Date format m.d.yy and spelling e.g. atomizer UK/AU version: Date format d.m.yy and spelling e.g. atomiser Backgrounds: Diagonal Vertical Features / how to use: -Dynamic status bar on Lock Screen, Main Screen, Settings Menu, Lock Settings and Device Monitor Settings. -Lock Screen shows asterisks (**) as you enter your unlock sequence. -Settings Menu shows the name of the highlighted icon. (Atomiser, Display, Puff Info etc.) etc. etc... Please note that you won't actually see 'DNA' on the screen, only relevant text. -Temperature, resistance lock and preheat options will only display when a temperature sensing material is selected. i.e. in plain wattage mode the options for these will disappear. -Selecting the coil material on the Main Screen takes you directly to atomiser settings. Note that coil material is not displayed if you are in wattage mode. -Most screens feature a 'Back' or 'Exit' button or a combination of both. 'Back' will take you back to the screen you came from, e.g. if you go to Atomiser Settings from the Settings Menu the back button will take you back to the Settings Menu. If you go to Atomiser Settings by selecting the coil material on the Main Screen, the Back button will take you back to the Main Screen. In all cases the Exit button will take you directly to the Main Screen. -Black background on the Device Monitor, Diagnostic and Device Info screens to make the text easier to see and read. -You can alter 'Watts:' and 'Temp:' on the Diagnostic screen. -Screens you can fire from: Main Screen (obviously), Atomiser Settings, Device Monitor and Diagnostic. Pressing the fire button on any other screen will give the same result as selecting 'Back'. e.g. if you are on the Display Settings screen you can press the fire button twice to go back to the Main Screen- pressing once goes back to the Settings Menu and another press takes you back to the Main Screen. -Select the graph on the Device Monitor page to access the Device Monitor Settings. -Board temperature and battery voltage are displayed at the bottom of the Main Screen. -Time & Date and Lock Settings are accessible from the System Settings screen. -The 'Display' icon on the Settings Menu changes based on whether stealth mode is enabled or disabled. -The options for stealth level are 'Off', '1', '2', or '3'. 3 = Screen turns off 2 = Very dim 1 = Dim Off = Stealth mode is disabled -Indicator light: Fade in/out red = charging Green = charge complete Blue/purple = firing Enjoy! -
Version 1.0.6
5,355 downloads
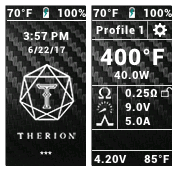
* NEW preheat feature in watts mode for kanthal / non temp control coils * Please see the release notes below for how to use. Note: For this feature to work correctly you will need to upload this theme using EScribe Suite 2.0 SP6 (or later) to a device with international firmware 1.1 SP26 (or later). For more information please see here: Early Firmware and Escribe Suite and here: Why international only . I have made this theme with the aim of including as many settings as possible whilst remaining user friendly. The text is large enough to see at a short distance but still (hopefully) remains visually appealing. I started with JCBs therion theme and added elements I liked from various other themes, I've also added a few extra screens to fit in all those settings. US version: Date format m.d.yy and spelling e.g. atomizer UK/AU version: Date format d.m.yy and spelling e.g. atomiser Different backgrounds have different colour schemes, e.g. the mossy green version uses green headings and green highlights etc. Dark Twilight Light Rays Cloudy Colour Deep Blue Diagonal Blue Mossy Green Ocean Features / how to use: ~Main Screen~ The two icons toward the middle if the screen are selectable, the left one takes you to Device Monitor and the right takes you to Puff Info. The value below the left icon displays the achieved wattage during the last puff, this is mostly useful for temp control but it can also be useful for battery diagnostic. The value below the right icon display last puff time. Selecting the coil material (when in temp control) will take you directly to Atomiser Settings. The values at the very bottom are board temperature and battery voltage, useful for quick diagnosis. -Large battery bar on lock screen for quick viewing. -Dynamic status bar on Lock Screen, Main Screen, Settings Menu, Lock Settings and Device Monitor Settings. -Lock Screen shows asterisks (**) as you enter your unlock sequence. -Settings Menu shows the name of the highlighted icon. (Atomiser, Display, Puff Info etc.) etc. -Temperature, resistance lock and preheat options will only display when a temperature sensing material is selected. i.e. in plain wattage mode the options for these will disappear. -Most screens feature a 'Back' or 'Exit' button or a combination of both. 'Back' will take you back to the screen you came from, e.g. if you go to Atomiser Settings from the Settings Menu the back button will take you back to the Settings Menu. If you go to Atomiser Settings by selecting the coil material on the Main Screen, the Back button will take you back to the Main Screen. In all cases the Exit button will take you directly to the Main Screen. -Black background on the Device Monitor, Diagnostic and Device Info screens to make the text easier to see and read. -You can alter 'Watts:' and 'Temp:' on the Diagnostic screen. -Screens you can fire from: Main Screen (obviously), Atomiser Settings, Device Monitor and Diagnostic. Pressing the fire button on any other screen will give the same result as selecting 'Back'. e.g. if you are on the Display Settings screen you can press the fire button twice to go back to the Main Screen- pressing once goes back to the Settings Menu and another press takes you back to the Main Screen. -Select the graph on the Device Monitor page to access the Device Monitor Settings. -Time & Date and Lock Settings are accessible from the System Settings screen. -The 'Display' icon on the Settings Menu changes based on whether stealth mode is enabled or disabled. -The options for stealth level are 'Off', '1', '2', or '3'. 3 = Screen turns off 2 = Very dim 1 = Dim Off = Stealth mode is disabled -Indicator light: Fade in/out red = charging Green = charge complete Blue/purple = firing Enjoy! P.S Thank you to all the theme creators whose elements I've ruthlessly and mercilessly pinched. Happy to remove them if it is an issue, just let me know -
I was wondering this also. Does the internal resistance vary between mods of the same model?
-
-
I’ve noticed something with watt increments but it could be just me.. new to evolv and escribe. On default condition my increment is set to 1 and no decimal places so it changes 61, 62, 63 etc. I added a condition so if the wattage is equal to or less than 20 it will display 1 decimal place and change in increments of 5. If I start above 20 Watts and try to lower it, it goes 21, 20, 19.0, 18.0 etc. It will only start adjusting by .5 if I unselect and reselect after going below 20 Watts. On the way up it works ok - 18.0, 19.0, 20.0, 20, 21 etc.
-
 Awesome theme! Love the wood grain background, the text is easy to read and it looks classy.
LIGHTRAYS_ecigtheme.991b1431793e26d3f4e1ddc07070976f.png)


DIAGONAL_ecigtheme.1077de2d850ed47aacba64e62302fc2e.png)
