

Podunk Steam
-
Posts
231 -
Joined
-
Last visited
-
Days Won
11
Content Type
Profiles
Forums
Downloads
Everything posted by Podunk Steam
-
Oh good, glad I could help. Now I just have to figure out this Stream 7 and the loading process for my TCRs and such. Too many pots on the fire!
-
I was leery of the Lemo 2 before I bought them because of the originals positive connection and looking at the pictures. Hard to beat the fill method though. Too many tanks out there with more parts to the + connections than needed in my opinion as well, just about everything with pre-built coils. Edit: Just got my first Ti wire dry hit, don't bother with the Lemo 2 on TC! Ok, I haven't downloaded and installed from Steam Engine yet but have been running 100F shy of intended temp. Not sure I'll be trying that again! Ignorance bit me on that one! Touch screen is a whole new ball game for me and this tiny Stream 7 I haven't got wired yet.
-
Open up your Lemo2 and push the insulator and + pin out of the 510 threaded area. Reinstall both through the inside with the large part of the + pin toward the interior. The insulator has to go in very straight. For me this has fixed fluctuating resistance as well as others that have tried it.
-

TEMP CONTROL ISSUE
Podunk Steam replied to mattykingropav's topic in Manuals, Instructions, and Tutorials
/topic/68188-topic/#3 -
Hello from Mod Crate
Podunk Steam replied to Russ ModCrate's topic in Connectors, Components, and Accessories
Thanks Blueridgedog! That's a different beasty and looks a lot more manageable with 12 gauge than other 510s out there. Oh boy, I snaked a display from a board for a repair being I ordered another display, hope they aren't out too long! -
When you put a new atomizer on make sure its at room temp as well as the mod. Click the fire button, click yes to new atomizer, click five times again quickly to put the mod in lock mode. In lock mode press both the plus button and the fire button for a few seconds to lock in the atomizers resistance. Click the fire button five times quickly again and you're good to go. This locks in the atomizers resistance.
-
My 200s showed up in the mail box today so I swapped the 204 battery contacts for the 209s and swiped a display from one of the new boards and all seems to be good. It auto fired the fire time but a battery reset and removing the atomizer cured it. I'd consider this an advanced build for anyone interested in the Bootlegger design. I'll be doing a complete video build once my other 3D prints show up that might help with the process. A picture of a customers build who managed a head start on me. I had the wrong 510 connector listed and the door screws needed a little adjusting but I like it.
-
Never mind, LMAOAMS!
-
Yeah what you said!
-
Hello from Mod Crate
Podunk Steam replied to Russ ModCrate's topic in Connectors, Components, and Accessories
There are some of us here that may not be partial to the ECF like myself, any chance on a good look at the connectors here? -
Sculpteo has been faster in my experience.
-
I was hesitant in upgrading a Stream 7 to Win 10 but have seen no issues with it.
-
Mod Crate 1590A CNC
Podunk Steam replied to Podunk Steam's topic in Connectors, Components, and Accessories
Okay, there we go, boiling Acetone just didn't do a thing to the parts I tested. -
Hello from Mod Crate
Podunk Steam replied to Russ ModCrate's topic in Connectors, Components, and Accessories
I've got three more 200s on the way, I'll show you what I mean. -
Mod Crate 1590A CNC
Podunk Steam replied to Podunk Steam's topic in Connectors, Components, and Accessories
I did exactly as I watched on Youtube and it didn't do anything to whatever plastic my print was made from. My best guess is it was PLA, it was a Snakeways print. -
Solder type at contact points?
Podunk Steam replied to Podunk Steam's topic in Installation and Assembly
I can't agree with you enough, the humble 510 has seen its day. They're not applicable in transmitting the power being applied to atomizers these days. -
Hello from Mod Crate
Podunk Steam replied to Russ ModCrate's topic in Connectors, Components, and Accessories
Yeah what he said. -
Looks like I get to assemble my first DNA 200 mod again. I botched the display somehow, first display I've messed up. I just ordered two more 3D prints and three more DNA200 boards. If first you don't succeed! Off with me to get more battery contacts.
-
Mod Crate 1590A CNC
Podunk Steam replied to Podunk Steam's topic in Connectors, Components, and Accessories
Russ the 1590 A with the milling I mentioned in the other thread just hits home with me. This has been a day of trial and tribulation for myself. The SX350J Bootlegger is a cake walk build, add the extra wires for the DNA200 , non-mounted display and it takes a little talent and friendly finessing. I fit the DNA200 Bootlegger together today and botched the display somehow, had to happen sometime, this is my first. It's vaping as it should and hooked to the Escribe I can see adjustments I'm make I just can't see them on the mod. Has there been any issues with the IGES mod files and displays being damaged with them? Reason I ask is I hacked the IGES files with Blender to make this mod incorporating our previous designs. When the display is in its recess the structure forces the ribbon to be bent right at the displays edge. The fire buttons location is very close and the ribbon does have to be bent pretty close to the display to not be in the way of the fire button. Anyway I have to acquire a new display if it would be possible. -
Hello from Mod Crate
Podunk Steam replied to Russ ModCrate's topic in Connectors, Components, and Accessories
That's all nice but why would you want to put a face plate in a box when the back interior of the 1590 A you make could be milled to have standoffs for mounting, display window, USB hole and button holes? I have plans to mill a press in structure that will do the equivalent of the mentioned. I'm not CNC equipped or I'd be doing it myself, it's a different world hand cracking everything! -
Mod Crate 1590A CNC
Podunk Steam replied to Podunk Steam's topic in Connectors, Components, and Accessories
Thank you and yes it does look a little better in person. I've been debating wire sizes, 510 pins and customizing of, charging cuircut wiring orientation..... Or this would have been done by now. This model originated as an entry level build kit utilizing the SX350j its a very simple build. The DNA 200 steps it up a few rungs on the ladder. -
Mod Crate 1590A CNC
Podunk Steam replied to Podunk Steam's topic in Connectors, Components, and Accessories
You know which type of plastic? Three coats appliance epoxy out of a rattle can.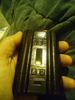
-
Mod Crate 1590A CNC
Podunk Steam replied to Podunk Steam's topic in Connectors, Components, and Accessories
I did test it with connecting part of prints and it didn't really work for me although there could be a difference in the plastic I tested to what I seen on the internet. -
Mod Crate 1590A CNC
Podunk Steam replied to Podunk Steam's topic in Connectors, Components, and Accessories
I'm very much a function before form person although when possible I can dress a mod very nicely. The 3D prints have an odd texture that absorbs the paint for the first few coats and if patience the texture can be smoothed through multiple coatings of paint and sanding between coats. Coating the 3D prints has been a work of trial and tribulation for myself, others have done much better than I have so far. -
Nice build pics and mod
