

JTree
-
Posts
57 -
Joined
-
Last visited
Content Type
Profiles
Forums
Downloads
Everything posted by JTree
-
Built it. I'm still away from home, but I may open it up tomorrow if I have a screw driver that's the right size with me. I triple checked everything before I sealed it up, though, so I doubt we are going to see anything wrong.
-
I'm tempted to plug it in to a computer to see what happens,but I'm concerned about blowing out a usb port.
-
I should have mentioned that I had already bought a replacement 12v to usb adapter and it blew that one too and tried different cords. Just for giggles I plugged it in to 2 different wall adapters tonight that I knkw to be good. No dice. On the plus side, it didn't ruin the wall adapters like it ruined the car adapters, but still......another board failing likely. I really want this to work. This board is the only accurate temperature limiting expierience i've ever had and both builds lasted a little longer than a day....enough to solidify my resolve, but this is frustrating.
-
The title says it all I guess. I'm not sure how much it's pulling because I'm not at home, but it will blow the fuse in a cigarette lighter usb adapter :/ Any ideas? I just got this board back from evolve after the first one fried on me. This is sad. Both times it worked for a day and then died Oh well....guess I'll pull out the back up mod for now.
-
Another example of exceptional service from evolve. My new board was mailed yesterday.
-
thanks. I'm sure the next one will be fine. Wish I knew what went wrong with this one, though.
-
nope. i was afraid that whatever caused it to blow would further damage the board. they said they may try to repair it, and if so, i don't want to make any more work for them.
-
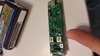
I didn't get real crazy with the wick or pump durring deconstruction, as you can see.
-
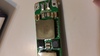
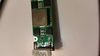
So my board has an rma number and is being shipped back to evolve. Here are the promised pics......no continuity across the fuse.
-
Sure. It'll be tomorrow, maybe, but i'll post some. I too am pretty hardcore about everything being clean. I take the solvent approach (sprayed it all down with starting aid after I got done). You'll see a little white crusty on one of the corners when I post, but that was super glue (lose magnet) and didn't get anywhere near the sensitive components.
-
On the plus side, the next build with go quicker, look better, and be more water resistant....in case someone decides to soak it in a bucket of water It took far more work to get the real estate inside the enclosure to work for me than it should have, lol
-
Yeah....I reached out to them already. Hope they honor it as warranty. I bought the board back in October, but didn't touch it until 4 days ago (busy life).
-
Also, mod res was set.
-
Model? Home grown. Built it to my spec. Everything is solid. I say it sounded like a fuse popping, and honestly i'm pretty confident the fuse did blow as I can't get continuity across the solder joints at the fuse.....but even if I replaced the on board fuse, that doesn't answer the question of why. I went back over all the connections, checked resistance in each lead, ect, ect.....again, everything is good. Did you read the work around? It's just playing around with the power/temp levels. Nothing it wasn't designed to do. In other words, it's not like I soaked it in a bucket of water over night.
-
great....just great.....so i tried this work around i found on this thread: /topic/65803-topic/ the standard method did not work at all, so i tried setting it to 1W instead....hit the button for a quarter second and it displayed temp protected. Went to take an actual puff and heard a click from inside the enclosure like a fuse popping sound.....dead. dead, dead, dead, dead, dead.
-
Everything worked fine for 1 day. Best vaping expierience i've ever had.....now back to power mode basically :/
-
Spaced coils already. Stable atomizer resistance.
-
Loaded a custom TCR for titanium from steam engine. The data shows properly on the graph. I have the Temp bubble selected in the general tab in escribe, I have the temp set point and real time temp checked in device monitor but.... When I go to device monitor, I can plainly see that the device isn't reading the coil temp in real time. The power delivored to coil jumps to the set point and stays in a steady line. Just looking at the device while firing, I can see that the temp display is blanked out during a puff reading "F ---". Any ideas?
-
I bought one out of lreland. Waiting g for life to give me a few hours for a build.
-
I wonder how long it takes to rectify something like that.
-
Went to order my board today....out of stock. Any hints as to when it will be available again?
-
Well i'll do some through bolts, then.....but it's after I ground to the case that I connect the battery?
-
After reading more posts, I'm afraid I need to ask an extremely noob question. When is it ok to connect the battery? I am planning on using an aluminum case. My current plan is to use 3 bolts glued to the inside of the case (with electrical epoxy) as studs to mount the board using 6 nuts so I can adjust the height as I go along. That grounds the board to the case right? At that point it is ok to install the battery, via an XT60 correct? BTW, what's the preferred epoxy in an application like this?
-
I know! It is a shame. The connection may not hold up over time, but I think I'll only use the quick charge every so often anyway, as I am often close to a usb port. I'm only concerned about it charging quickly because I still have a hard time with the idea that I can'T just yank out the battery (ies) quickly and easily and replace with charged ones. Hence the reason I avoided on board batteries for so long.....but this chip has enough functionality to get me to try it out. If a 3x 18650 mod would be small enough for my taste, or if the functionality wasn'T crippled with 2 18650s, I'd go another route, but it is what it is I guess.
-
http://www.hobbyking.com/hobbyking/store/__81601___3S_4_Pin_JST_XH_Balancer_Connectors_Male_Female_5_pairs_.html No part numbers, but I'm all but certain this is the correct parts. If not, no matter, these will work regardless. When I get them in, I'll be sure to look for a real part number on the packaging and/or stamped on the part itself.


